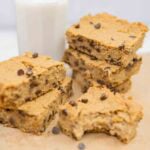
Chocolate Chip Chickpea Blondies
These vegan chickpea blondies are soft, chewy, and perfectly fudgy, with melty chocolate chips in every bite. Made with simple plant-based ingredients and protein- and fiber-rich chickpeas, they’re a healthier twist on the classic blondie without sacrificing that decadent texture and flavor. And don’t worry—you’d never guess there are chickpeas hiding inside! One bite, and you’ll be reaching for another.
Servings: 16 Blondies
Calories: 235kcal
Ingredients
- 3 cups cooked chickpeas (2) 15 oz cans
- 1 cup natural peanut butter
- 1/3 cup pure maple syrup
- 2 teaspoons vanilla extract
- 1/4 cup unsweetened oat milk
- 1 cup oat flour
- 1/2 teaspoon baking powder
- 3/4 cup vegan chocolate chips
Instructions
- Preheat the oven to 350°F. Line an 8 x 8-inch baking dish with parchment paper to prevent sticking and make the blondies easier to remove after baking.
- Drain the canned chickpeas and rinse them thoroughly under running water. Allow them to drain well to remove as much excess water as possible.
- Add the chickpeas, peanut butter, maple syrup, vanilla, oat milk, oat flour, and baking powder to a food processor. Blend until completely smooth and creamy, stopping to scrape down the sides as needed. If your food processor is small, blend the ingredients in two batches and combine them afterward. Transfer the batter to a mixing bowl and allow it to cool before adding the chocolate chips.Note: No need to buy expensive oat flour! You can easily make your own by blending old-fashioned oats in a blender or food processor until they reach a fine, flour-like consistency. If you’d like, simply do this first before adding the remaining ingredients.
- Once the batter has cooled, gently fold in the vegan chocolate chips. Waiting until the batter cools helps keep those little chocolate chips from melting before they ever make it into the oven.
- Transfer the batter to the prepared baking dish and spread it evenly into the corners. Smooth the top with a spatula so the blondies bake evenly. Sprinkle a few extra chocolate chips on top if you’d like.
- Bake for about 35 minutes at 350°F. Remove from the oven and allow the blondies to cool completely before slicing. They’ll continue to firm up as they cool, so don’t rush this part—then slice, serve, and enjoy!
Video
Notes
Helpful Tip: Step-by-step photos are included above to guide you through the recipe and make it easy to follow. There are also FAQs, variations, and serving suggestions.
Can You Taste the Chickpeas?
This is probably the question I get asked most often whenever I share a dessert made with chickpeas! I hear it all the time with our edible chickpea cookie dough, and my answer for these blondies is the same: nope!
No one is ever going to bite into one of these and say, “Wait a minute...are there beans in here?” Once the chickpeas are blended with the peanut butter, maple syrup, vanilla, and the other ingredients, their flavor completely disappears into all that sweet, vanilla chocolatey goodness.
The key is to stick with the recipe and the measurements as written. The balance of ingredients is what keeps the chickpeas undercover while letting them do their job of creating that wonderfully soft and fudgy texture. So go ahead and serve them without announcing the secret ingredient. I won’t tell if you don’t!
Substitutions & Variations:
- Peanut butter – Almond butter or cashew butter are easy swaps. For a nut-free option, sunflower seed butter works especially well. Tahini can also be used, but it will give the blondies a slightly more earthy flavor.
- Maple syrup – Agave nectar, date syrup, or brown rice syrup can be substituted 1:1. Date syrup may make the blondies slightly darker and give them a deeper flavor.
- Oat milk – Almond, soy, cashew, or another unsweetened plant-based milk can be used instead. Coconut milk can also work, though it may add a subtle coconut flavor.
- Oat flour – To keep these chickpea blondies gluten-free, be sure to use certified gluten-free oat flour. You can also make your own by blending old-fashioned oats into a fine flour.
- Chocolate chips – Use your favorite dairy-free semi-sweet or dark chocolate chips. Chopped dairy-free chocolate is another delicious option for bigger pockets of gooey chocolate.
- Add some crunch – Fold in chopped walnuts or pecans for a little extra texture and nutty flavor.
- Make them extra chocolatey – Sprinkle a few extra chocolate chips over the top before baking. It makes them look pretty irresistible, too!
Nutrition
Serving: 1square | Calories: 235kcal | Carbohydrates: 30g | Protein: 9g | Fat: 13g | Sodium: 30mg | Fiber: 4g | Sugar: 13g