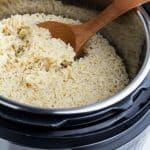
Instant Pot Brown Rice
No-fail and no fuss is what this Instant Pot brown rice cooking method is. Make the perfect rice every time without even needing to stir the pot.
Servings: 3 servings
Calories: 73kcal
Instructions
- Begin by washing the rice in a rice rinsing bowl by running water over it.
- Next, place the rice into your Instant Pot and add the water. You might want to stir it at this point, but it’s not absolutely necessary. Just make sure all of the rice grains are under the water.
- Put the IP lid on and lock it into place. Set the valve in the SEALING position and set to MANUAL high for 15 minutes. It will take about 10-minutes for the pressure to build, and then it will begin the actual cooking process.
- Once it beeps to let you know that the rice has finished cooking, let it sit for another 10-minutes to release the pressure naturally. This gives the rice a little more cooking time and makes it more tender.
- After the 10-minute natural release, carefully turn the valve to the VENT position and allow the rest of the steam to be released. After all of the pressure has been released, it should be safe to open the lid.
Video
Notes
Tips & Suggestions:
I have included step-by-step photos and directions above to ensure your first attempt will be successful.
- Rice- Different types of rice require different cooking times. Brown rice takes the longest.
- Rinse first- Remember to rinse the rice before cooking. This gets rid of any dust or impurities that may be on the grains, resulting in cleaner, fluffier rice with a better texture.
- Safety- Always be careful when turning the pressure valve to the VENT position after cooking. You might even want to use a spoon to do this because steam can escape and burn your fingers.
Nutrition
Serving: 1g | Calories: 73kcal | Carbohydrates: 15g | Protein: 2g | Fat: 1g | Fiber: 1g