
Chili Cheese Fries | Vegan
Vegan Chili Cheese Fries are plant-strongly amazing! Crispy oil-free fries, topped with layers of tangy spicy chili and creamy vegan cheese sauce. Perfect for satisfying your comfort food cravings in a healthier, guilt-free way!

Want to Save This Recipe?
Enter your email & I’ll send it to your inbox. Plus, get great new recipes from me every week!
By submitting this form, you consent to receive emails from EatPlant-Based
I never thought I would have chili cheese fries again after switching to a whole-food, plant-based lifestyle. This is one time that I’m glad I was wrong. These vegan chili cheese fries are fantastic, and I don’t mind telling you that the secret ingredient is the homemade vegan cheese sauce and the vegan bulgur chili is so amazing that we use it on carrot dogs and vegan black bean burgers as well.
This recipe is so good, that it was even published on the T. Colin Campbell Center for Nutrition Studies website.
Reasons you will love this recipe
- Loaded with Flavor: These vegan chili cheese fries are a deliciously indulgent treat without any of the guilt. Packed with a zesty, savory chili made from plant-based ingredients and topped with creamy, dairy-free cheese, each bite bursts with mouthwatering flavor that even meat-lovers will enjoy.
- 2. 100% Plant-Based: These cheese fries are completely vegan, and they’re a perfect option for those who care about sustainability and ethical eating.
- 3. Perfect for Any Occasion: Whether you’re hosting a game night, having a movie marathon, or just craving a satisfying snack, these vegan chili cheese fries fit the bill. They’re easy to prepare, incredibly filling, and are sure to be a hit with your friends and family.
How to make vegan chili cheese fries
The recipe card at the bottom of the page has the full list of ingredients with measurements and instructions.
This dish is really three recipes in one—oil-free french fries, vegan chili, and dairy-free potato cheese sauce–and each of these recipes can be used with many other dishes.
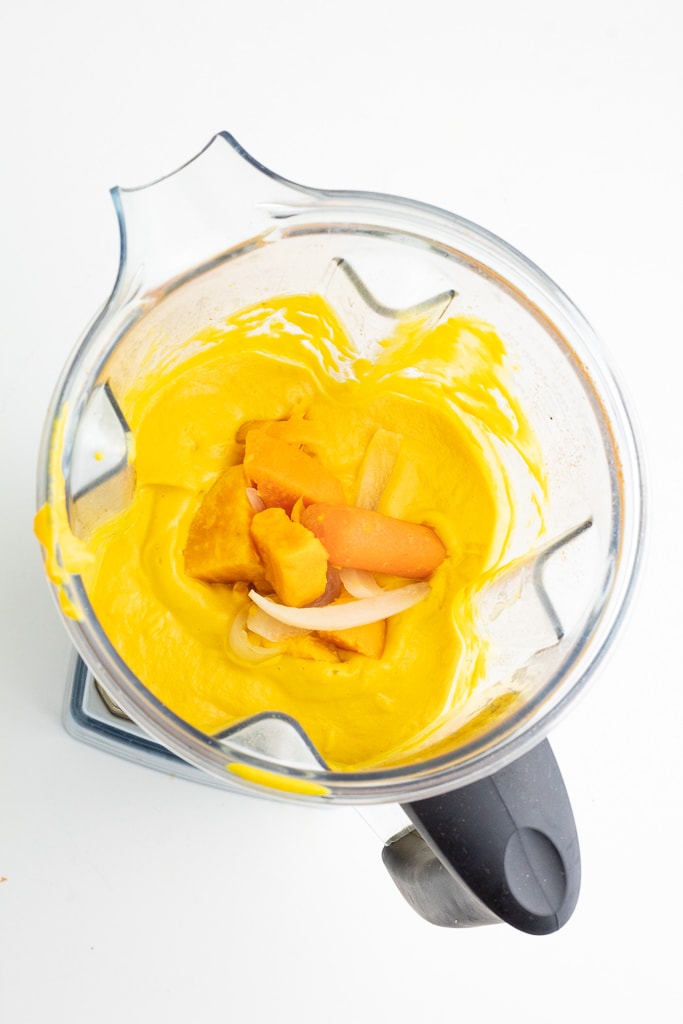
STEP #1: Begin by making the vegan cheese sauce. Making it is as simple as boiling a pot of potatoes, onions, and carrots, adding them to a blender with spices, and blending until smooth. I have a Vitamix blender, so it can cream this cheese sauce up in just about 1-minute. Set this sauce to the side until it’s time to add it to the fries.
This recipe makes approximately 1 quart and can be stored in the refrigerator for up to 2 weeks to be used on baked potatoes, tacos, lasagna, and so much more!
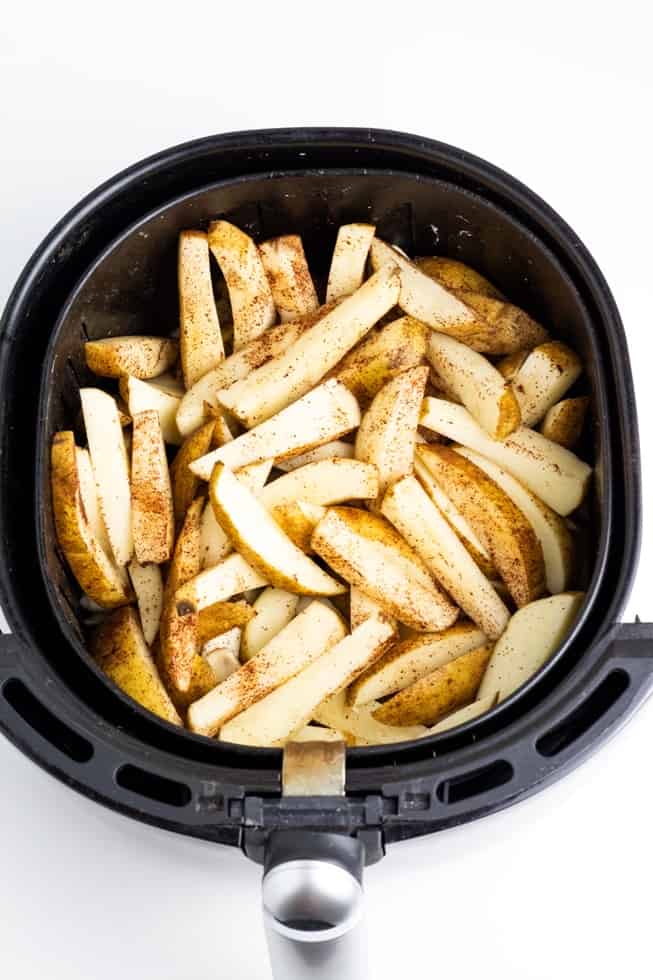
STEP #2: Now, it’s time to make the oil-free french fries. First, wash and scrub your potatoes. I like to use Russet or Yukon potatoes to make my fries, but you really can use any type you like, even sweet potatoes if you prefer.
Slice the potatoes to the thickness you like. I like to leave mine a little thick so that they are fluffy on the inside and crunchy on the outside.
Sprinkle with a few spices (or none at all) while they are still damp from being freshly cut. This helps the dry seasonings to stick to them. Some of the spices I like to use are garlic powder, onion powder, smoked paprika, chili powder, sea salt, and Chipotle powder.
STEP #3: Place in the air fryer basket and set the temperature to 400°F and the time to 20 minutes. Unlike many people, I load the basket up with cut fries and pile them on top of each other. Often, I will have 4-5 medium-sized potatoes cut up in my Ninja 5.5 quarts basket.

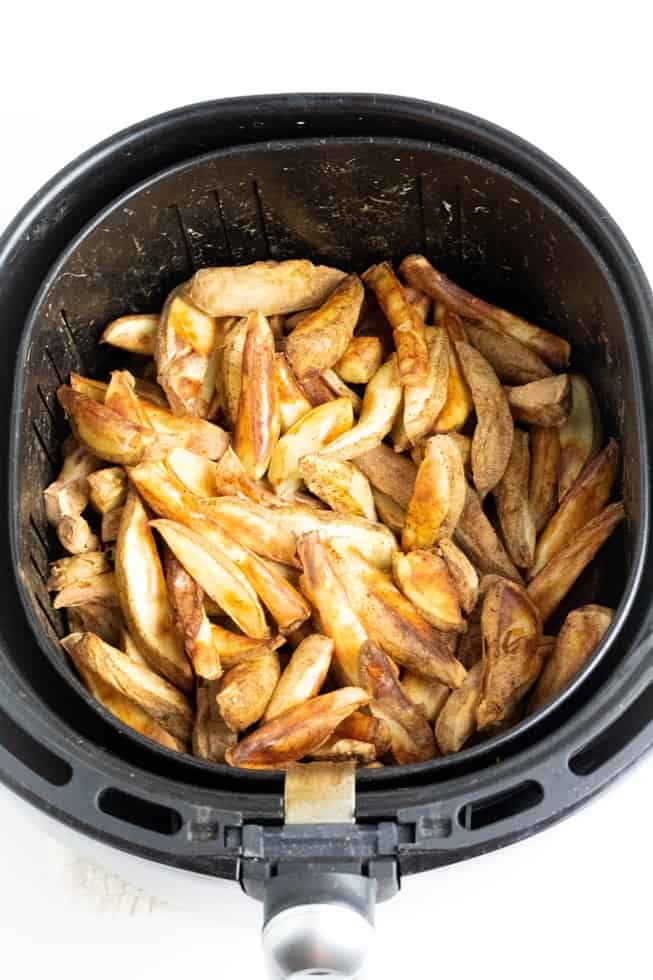
STEP #4: The trick to getting them crispy on all sides is to cook them for 20 minutes then stop and shake or shuffle the potatoes to reposition them and allow them to cook another 20 minutes. I use a spatula or spoon to help stir them around a bit. Cooking times will really depend on how many potatoes you have in the basket and how thick or thinly they are sliced. Air fryer cooking times will also vary.
While the fries are cooking, go ahead and make the chili.
Baking french fries
If you are baking your fries in the oven, it’s a good idea to parboil them for about 5 minutes before baking. This will help them to be more crispy and less chewy.
After parboiling, remove them from the water and season as described above in the air fry directions. Bake in the oven at 400°F for approximately 20-25 minutes until crispy golden brown.
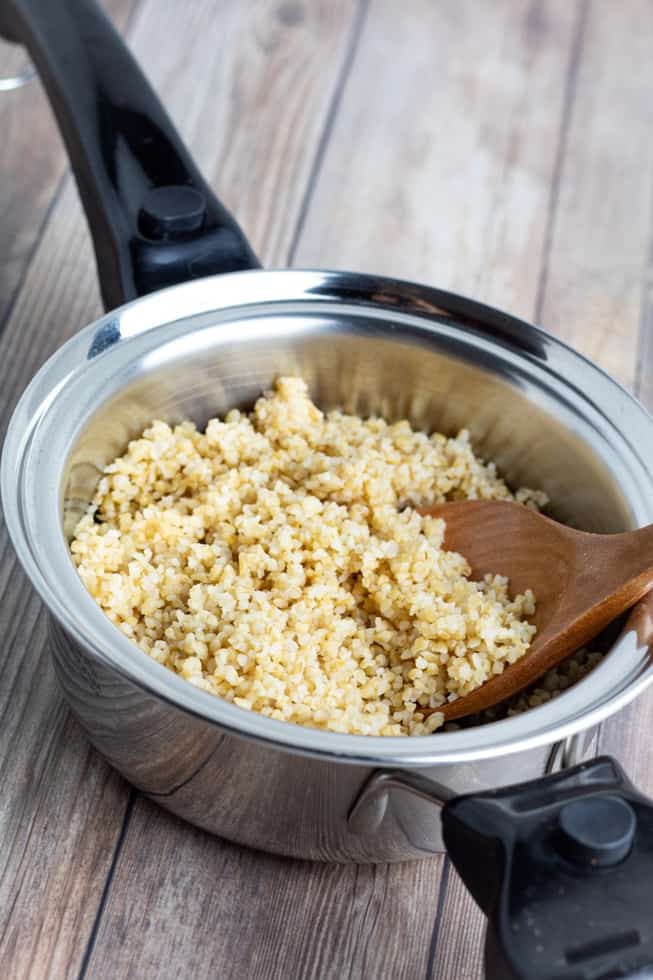
STEP #5: The final recipe is to make the vegan bulgur chili. Cook the bulgur wheat according to the package directions. This should take about 15 minutes on the stovetop, and it cooks just like rice. It can be made in a microwave in less time.
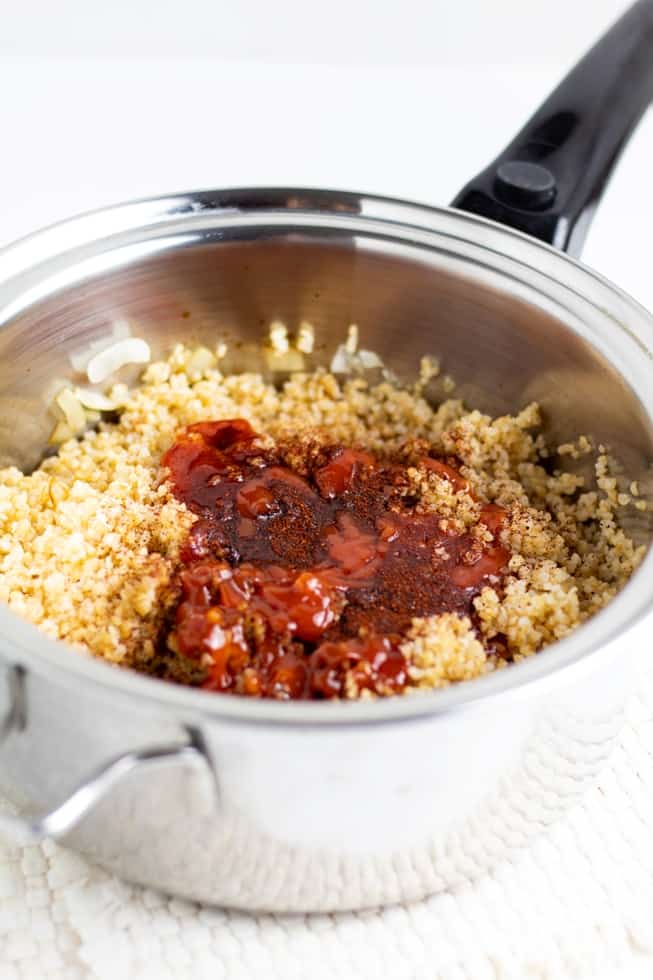
STEP #6: In a saucepan, saute diced onions in approximately 3 Tbsp of the veggie broth. As they brown and begin to caramelize, add more veggie broth 1 Tbsp at a time. Allow them to caramelize well.
Add all other chili ingredients including the bulgur, stir well, and simmer for approximately 15 minutes.
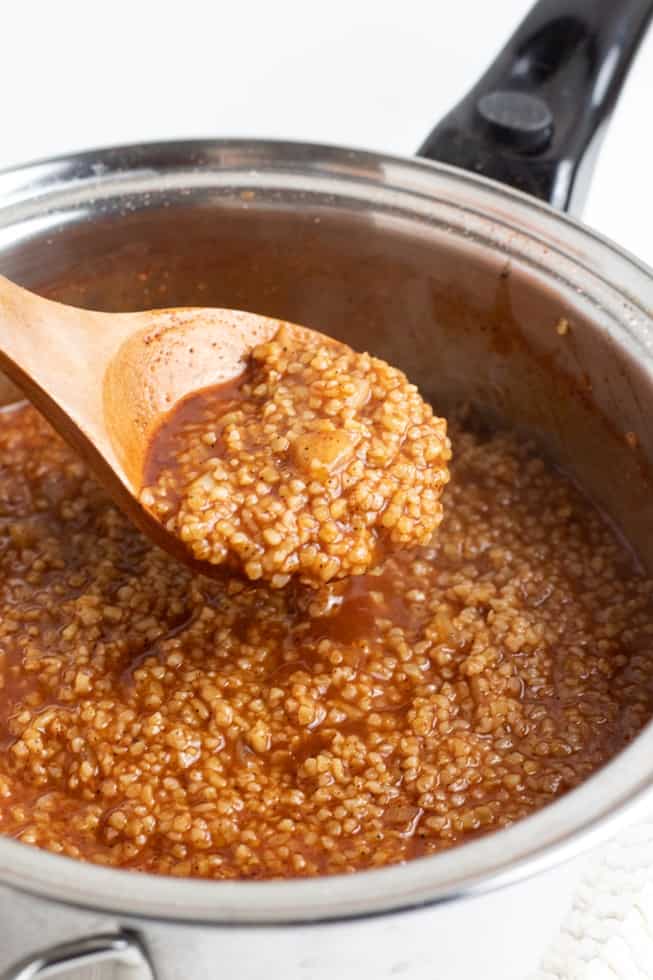
STEP #7: Cover and turn off. Chili is basically done and ready to be eaten.
*NOTE: If you already have pre-cooked bulgur (2 cups) in the freezer that you would like to use, simply omit the veggie broth/water except for about 1/2 a cup, and cook for only 5 minutes.

STEP #8: Now, it is time to layer the Chili Cheese Fries! Start with the crispy fries, spoon chili over the top, then drizzle with cheese sauce. I like to top mine with a few diced green onion chives. Serve and enjoy!
Frequently Asked Questions
If you need a gluten-free grain, try making this vegan chili with buckwheat groats. They are similar in texture and will work well.
You can make the cheese sauce and chili ahead of time, and I even recommend doing that because it speeds up the process. I wouldn’t make the fries ahead because they become chewy. Wait to layer everything until right when you plan to eat it.
The cheese sauce and chili can be stored separately in an airtight containers in the refrigerator for up to 10 days. If you have leftover fries, they won’t reheat as well. Keep them in a ziplock bag in the refrigerator and reheat them in your air fryer for best results.

More Favorite Vegan Recipes


For those of you new to the whole food plant-based lifestyle, we’ve created a FREE 7-Day Plant-Based Menu Planner to help you get started!
If you try this recipe, please let us know how you like it by rating it and leaving a comment. We love to hear from you!
Want to Save This Recipe?
Enter your email & I'll send it to your inbox. Plus, get great new recipes from me every week!
By submitting this form, you consent to receive emails from EatPlant-Based

Chili Cheese Fries Vegan
Ingredients
Potato Fries
- 4 medium potatoes
- 1/2 teaspoon onion powder
- 1/2 teaspoon garlic powder
- salt to taste
Vegan Chili
- 1/2 cup onion diced
- 1/2 cup veggie broth
- 1 cup dry uncooked bulgur (or 2 cups cooked)*
- 1/2 cup ketchup
- 1 tablespoon worcestershire sauce without anchovies
- 1 teaspoon chili powder
- 1/2 teaspoon smoked paprika
- 1/2 teaspoon onion powder
- 1/2 teaspoon garlic powder
- 1/2 teaspoon season salt
- small pinch cayenne pepper optional for spice
Vegan Cheese Sauce
- 1 cup potatoes peeled and diced
- 1/4 cup onions diced
- 1/4 cup carrots diced
- 1 cup broth from veggies reserved
- 1/2 cup raw cashews OR 1/2 cup white beans
- 4 tablespoons nutritional yeast flakes
- 1 tablespoon lemon juice
- 1 teaspoon salt
- 1/2 teaspoon garlic powder
- 1 teaspoon paprika
- small pinch cayenne pepper optional
Instructions
Potato Fries
- Begin by washing and slicing large potatoes. I leave the peelings on mine, but they can be removed if you prefer.
- If you are using an air fryer, simply place the sliced potatoes in the fryer and season them with garlic powder, onion, powder, chili powder, and a little salt.
- Set the air fryer temperature to 400°F and time to 15 minutes. Shake or stir them to rearrange to allow them to get crispy on all sides. Set the time and temperature for another 15 minutes. Cook longer if needed to get them golden crunchy brown.
- If you are baking your fries in the oven, it's a good idea to parboil them for about 5 minutes before baking. This will help them to be more crispy and less chewy.
- After parboiling, remove them from the water and season as described above in the air fry directions. Bake in the oven at 400°F for approximately 20-25 minutes until crispy golden brown.
Vegan Cheese Sauce
- In a medium pot, bring about 3 cups of water to a boil. Place potatoes, carrots, and onion in the pot and allow to cook until veggies are tender, approximately 15 minutes. Cooking time will vary based on how small the veggies are diced. While these are cooking, start working on the chili.
- When veggies are tender, drain and place them in a blender. NOTE: reserve 1 cup of the broth, and add to blender. Add all the remaining ingredients, and blend until smooth.
- Now, it's ready to use in chili cheese fries, nacho cheese dip, mac-n-cheese, topping for steamed broccoli, or anything else you need a creamy, cheesy sauce in. This makes approximately 1 quart and can be stored in the refrigerator for up to 2 weeks.
Vegan Chili
- In saucepan, saute diced onions in approximately 3 Tbsp of the veggie broth. As they brown and begin to caramelize, add more veggie broth 1 Tbsp at a time. Allow to caramelize well.
- Add all other chili ingredients, stir well, and simmer for approximately 10-15 minutes. Cover and turn heat down to warm or off. Chili is basically done and ready to be eaten.
- *NOTE: If you already have pre-cooked bulgur (2 cups) in the freezer that you would like to use, simply omit the veggie broth/water except for about 1/2 a cup, and cook for only 5 minutes.
Chili Cheese Fries
- Now, it is time to layer the Chili Cheese Fries! Start with the crispy fries, spoon chili over the top, then drizzle with cheese sauce. I like to top mine with a few diced green onions. Serve and enjoy!
Video
Notes
Nutrition
Disclaimer
To obtain the most accurate representation of the nutritional information in a given recipe, you should calculate the nutritional information with the actual ingredients used in your recipe, using your preferred nutrition calculator. You are solely responsible for ensuring that any nutritional information provided is accurate, complete, and useful.

About Terri Edwards
Hi guys! I’m the content creator behind EatPlant-Based and a licensed Food for Life instructor with the Physicians Committee for Responsible Medicine. I’m passionate about sharing healthy recipes and tips to help others care well for their health and the bodies God has given us. I’m so glad you’re here! Read More…
I’m trying this recipe tomorrow I’m new to plant based food so far its been pretty good but needs cheese in my diet I hope this works for me thanks for all the recipes.
Hi. A question I can’t seem to get answered. Is bulgur the same as nutritional yeast? Can it be used the same way? Tks in advance! Sue
Hi Sue- Bulgur and nutritional yeast are completely different. Bulgur is a grain, much like rice and this article will help with understanding how to use it https://eatplant-based.com/what-is-bulgur-cook-recipes/ . Nutritional yeast is just a nutty cheesy flavoring for foods, and this article explains more about it https://eatplant-based.com/nutritional-yeast-recipes/ . Hope this helps.
Would Kamut be similar to the bulgur? I only have that and really want to make this tonight:)
I haven’t tried it with kamut so can’t say for sure. The texture would definitely be a bit different, but certainly worth a try. Let us know!
I am Gluten intolerant. In the recipe “Chile Cheese Fries” could I use cauliflower rice in place of bulger in the chile part of the recipe?
Love your site. Thank you.
I haven’t tried it with cauliflower rice but think it would work just fine. This article also has other substitutes for bulgur that might be helpful. They are listed at the bottom. https://eatplant-based.com/what-is-bulgur-cook-recipes/
Another great recipe is the vegan cheese sauce. I made it the day before yesterday for my pizza, and it was really good. I had it yesterday with your black bean burgers and it was even better. Finally this morning we used it as a “sauce hollandaise” for our poached eggs (which we still have occasionally, because a life without poached eggs is not worth living) and thought it was absolutely awesome!
We felt the sauce gets better with time.
Thank you for this recipe!
Is it possible to make without the yeast flakes? The one place that I found carries it in my area is very expensive. Is there a substitute for it?
What area are you in? Do you have an Ingles or Publix grocery store?
I buy bulger in bulk and we’ve only made it in the microwave. (I’m a huge plant based newbie) so in bulk it has no directions.. Could you post them
Absolutely! And, if you have a rice cooker/steamer it’s even easier. Simply add water and press button. I love my rice steamer for making rice, bulgur, quinoa, and more!
Stove top cooking instructions:
Add 1 cup bulgur to 2 cups cold water. Bring to a boil; cover and simmer for 12 – 15 minutes or until tender. Drain off excess liquid. Makes 2 to 2-1/2 cups cooked bulgur.
Looks delicious! Does the recipe call for 2 cups of cooked bulgur or 2 cups of raw bulgur that is then cooked. Thank you so much!!!
The 2 cups of bulgur called for in this recipe are already cooked. I like to make a big batch of bulgur, use what I need, and freeze the rest for dishes I make at a later time. This makes other recipes like tacos, spaghetti, and lasagna easier, because one step is already completed.