
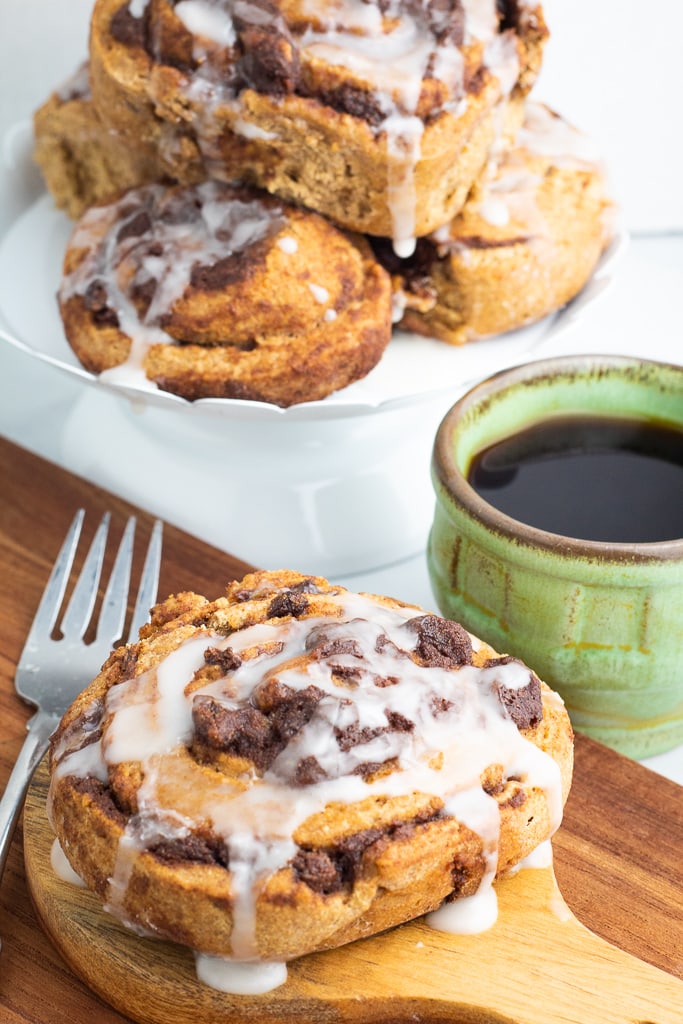
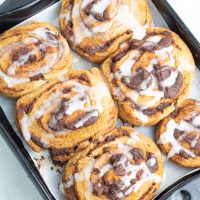
Best Vegan Cinnamon Rolls (Oil-Free)
These vegan oil-free cinnamon rolls are irresistibly good, offering a soft, gooey center and a perfect blend of sweet cinnamon and spice, all without the use of oils. They’re a healthier indulgence that doesn’t compromise on flavor or texture.
Want to Save This Recipe?
Enter your email & I’ll send it to your inbox. Plus, get great new recipes from me every week!
By submitting this form, you consent to receive emails from EatPlant-Based
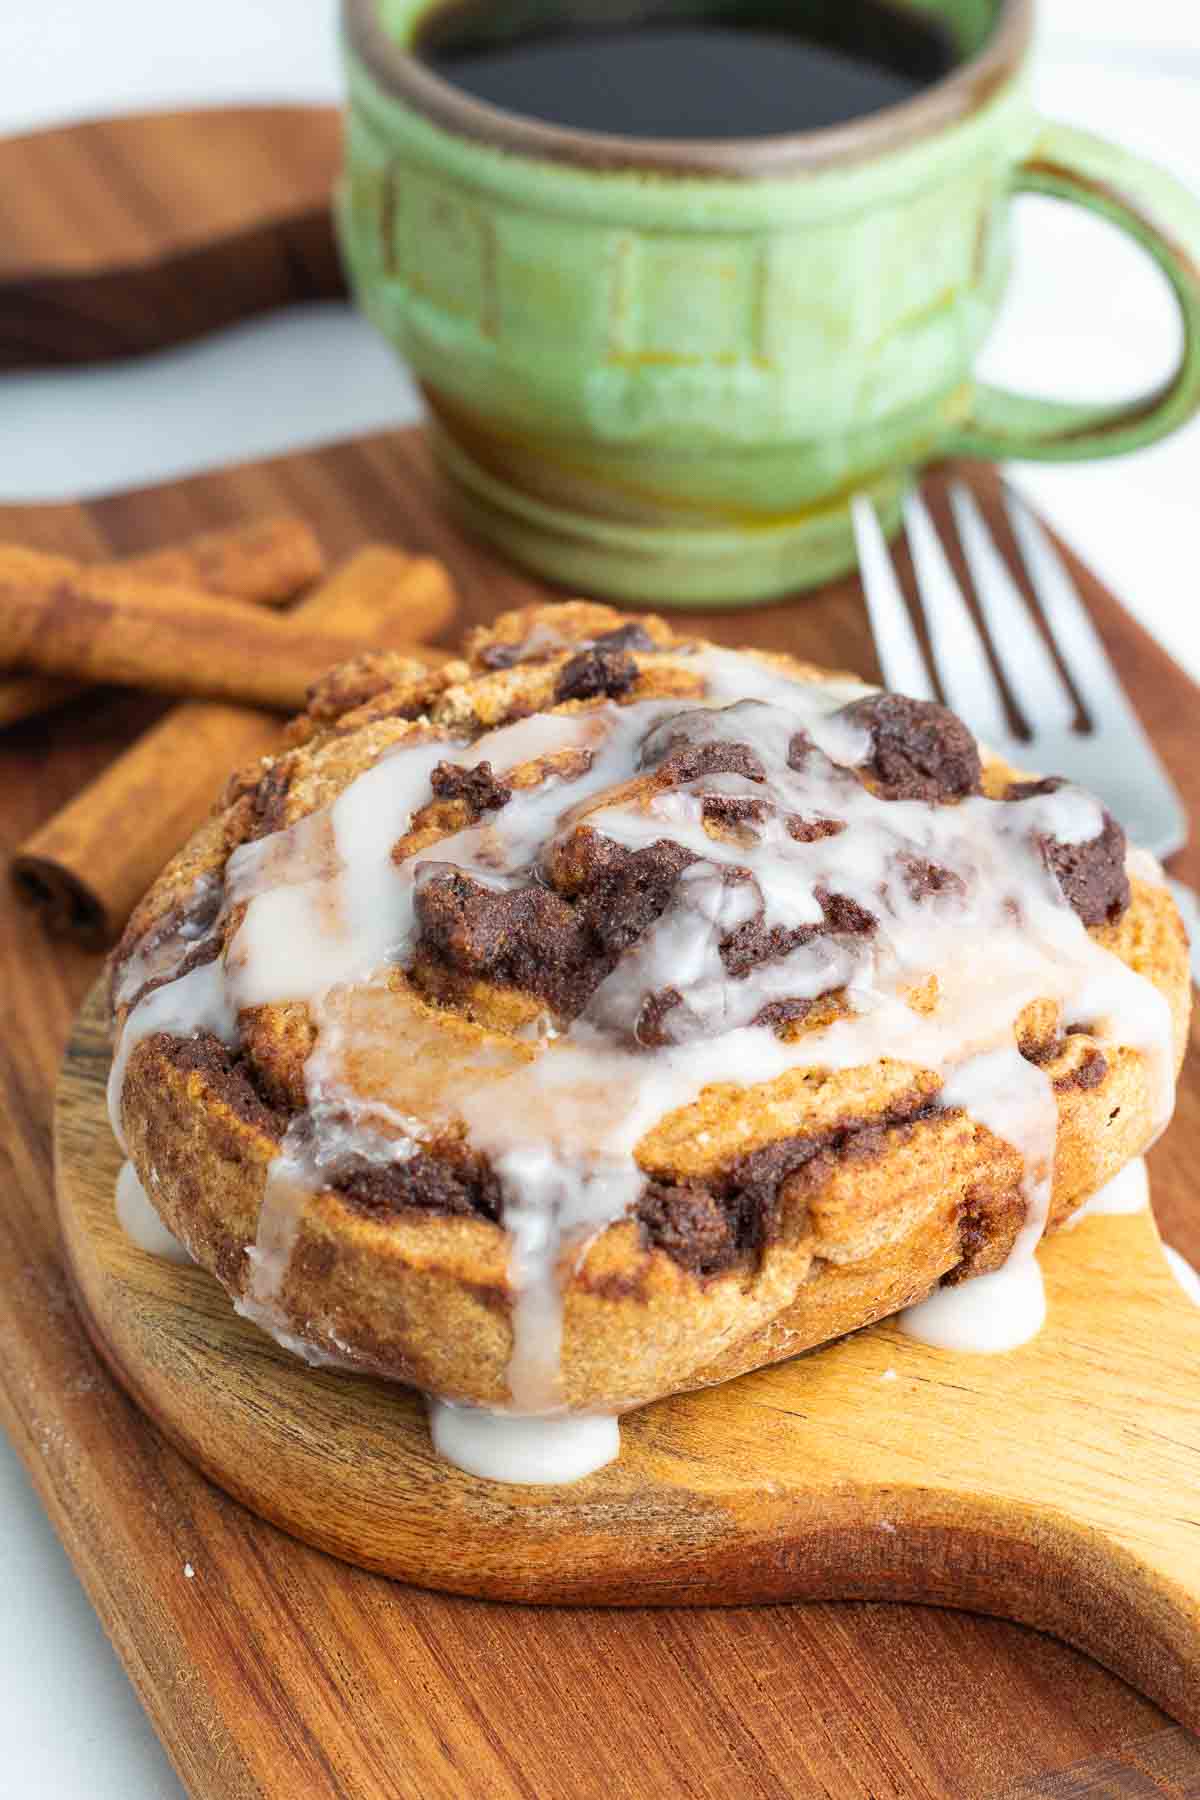
Deliciously sweet and perfectly frosted, these dairy-free cinnamon rolls are filled with cinnamon and raisins and are absolutely lip-smacking delicious!
Let me be clear here that I am not saying that cinnamon rolls–even vegan, oil-free, egg-free, dairy-free ones–are a healthy food to make and eat all the time. But, for the holidays and special occasions like Mother’s Day and even Valentine’s Day, these are a great option for something sweet. Other great options include my Vegan Carrot Cake and Chocolate Vegan Sugar-Free Cake.
I’m not going to kid you. It took me a while to tweak these dairy-free cinnamon buns to get them to where I was happy with them. It began with a recipe from Chocolate Covered Katie and ended with the version here. Since I don’t cook with any oil, it was a bit challenging to come up with a finished product that I was really happy with.
Reasons you will love this treat
- Naturally Sweet and Flavorful: Infused with rich cinnamon and a touch of natural sweeteners, these rolls deliver a deliciously sweet and spiced flavor that’s both satisfying and wholesome.
- Perfect for Any Occasion: Whether it’s a cozy weekend breakfast, holiday brunch, or a special treat, these vegan cinnamon rolls are versatile and perfect for any occasion.
- Healthier Ingredients: Made with plant-based ingredients, these rolls provide an alternative to store-bought options, making them a great choice for those focused on less processed treats.
Pro tips & substitutes
- Flour- I like to use whole wheat pastry flour to make these cinnamon rolls, but other flours such as spelt and regular wheat flour can also be used.
- Gluten-Free Options- Though I haven’t tried these with any gluten-free flour varieties, Minimalist Baker has a great Gluten-Free Flour Guide that should help with substituting in this recipe.
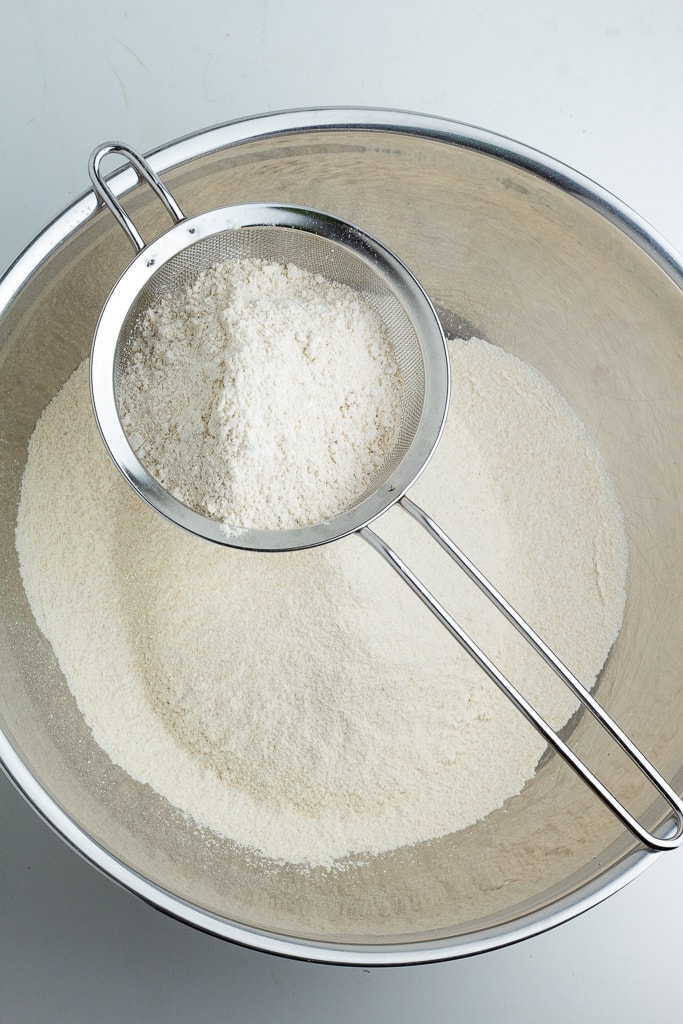
- Sifting Flour- I do like to sift my flour when baking pastries because it lightens them up even more. I also have found that adding the baking powder to be sifted with the flour gets out any clumps.
- Rolling- The rolling up of the dough with the filling is the hardest part because the filling wants to ooze out. Just be gentle and lift up and over when making the next rolling motion to help keep it all in. Any filling that seeps out can be used to top the rolls before baking.
- Applesauce- If applesauce isn’t available in your area, it’s pretty simple to make your own unsweetened homemade applesauce.
How to make vegan cinnamon rolls
The recipe card at the bottom of the page has the full list of ingredients with measurements and instructions.
Don’t be afraid of this recipe due to the length of the instructions. I’m trying to be very thorough for those who have never baked before, so I am going to be a little long-winded here to make sure everyone is comfortable with the process. The outcome is so worth the effort, and it’s quite fun I think. If you are really looking for an easy dessert to try for beginners, check out my No-Bake Chocolate Pie.
STEP #1: Begin by warming 1 cup of your choice of plant milk to approximately 110°F. I used almond milk but other plant milk varieties will work just as well. To do this, place the milk in a microwave-safe bowl and heat for approximately a little over 1 minute–for my microwave, it was 1:15 minutes. Use a food thermometer to check the temperature.
After heating, stir in 2 tablespoons of the sweetener of your choice and whisk together well. I use date sugar for mine. I noticed that in a few other recipes, some chefs do not add sugar at this point, but I learned that the sugar actually feeds the yeast and helps it to rise better.
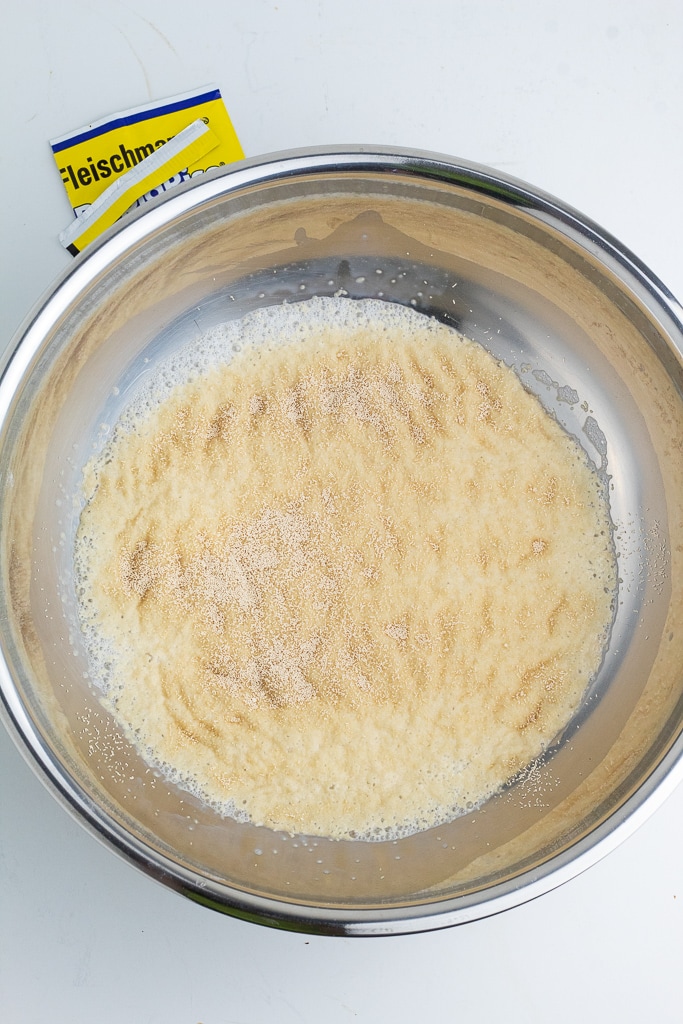
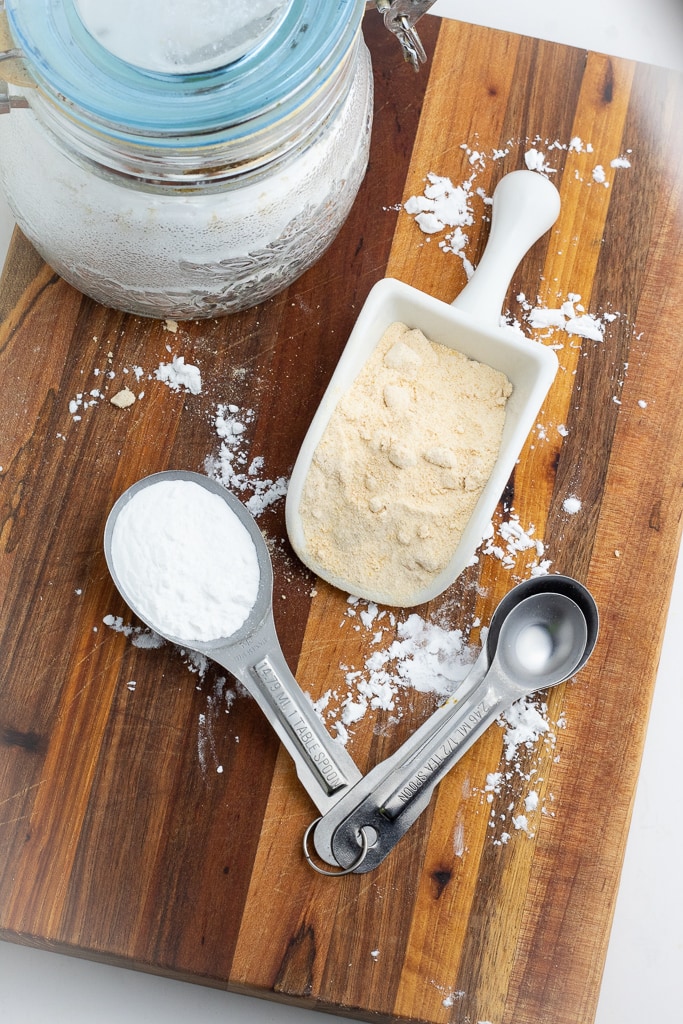
STEP #2: Next, sprinkle one packet of the active dry yeast on top of the milk mixture and allow it to sit for about 5 minutes. No need to stir it, just sprinkle the top. You’ll notice that it will bubble up a little bit (see the photo above), and this is what you want. If it didn’t bubble up at all, the milk temperature was likely too hot or too cold. You’ll need to dump it and try again.
STEP #3: While the yeast is being activated, find a large mixing bowl and add the dry ingredients to it–2.5 cups flour, 2 tablespoons baking powder, 1/2 cup sweetener, 1/2 teaspoon salt, and 2 tablespoons cinnamon–and whisk together well.
I sift my flour and baking powder before adding it to the bowl to make sure it is light and fluffy, but this step is optional.
STEP #4: Once the milk and yeast mixture is ready, add in the vanilla and applesauce and whisk together. Then, pour the wet mixture into the larger bowl with the dry ingredients and stir with a large spoon to form a sticky dough.
At this point, the dough will be very sticky and you’ll likely need to add a couple of tablespoons or more of flour to form it into a dough ball. You will need to use your hands to do this, so make sure to keep flour on them as well.

STEP #5: Make sure there is a thin layer of flour on the bottom of your large mixing bowl underneath the dough ball to prevent it from sticking to the bottom. Cover the bowl loosely with a dishcloth and allow it to set in a warm dry place to rise. It should take about an hour to double in size.
While it is rising is a good time to mix up the filling that will be layered over the dough before rolling it into buns.
Go ahead and preheat the oven to 325°F and line a 9″x13″ baking dish with parchment paper to prevent sticking. Set it to the side until needed.

STEP #6: After the dough has finished rising, it’s time to knead it. To do this, sprinkle some flour on a flat surface and knead with your hands. If you’ve never kneaded dough before, this short video clip will show you how. Knead the dough for approximately 5 minutes (or 15-20 times) dusting with additional flour as needed.
STEP #7: Using a floured rolling pin, roll the dough out into a large, thin rectangle (approximately 1/4″ thick) or as close as you can get to it. If the dough sticks to your rolling pin, dust the top with a little more flour.
STEP #8: I like to make the filling while the dough is rising and just set it to the side until it is needed after kneading the dough.
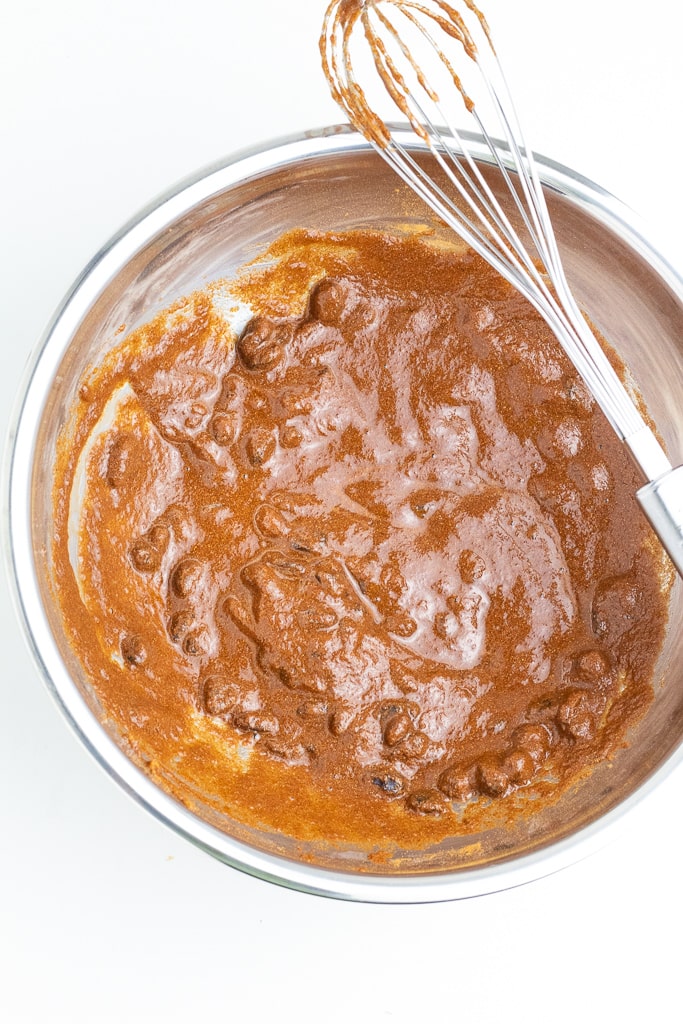
In a medium-sized mixing bowl, add date sugar or another sweetener, cinnamon, applesauce, and raisins, and stir together well.
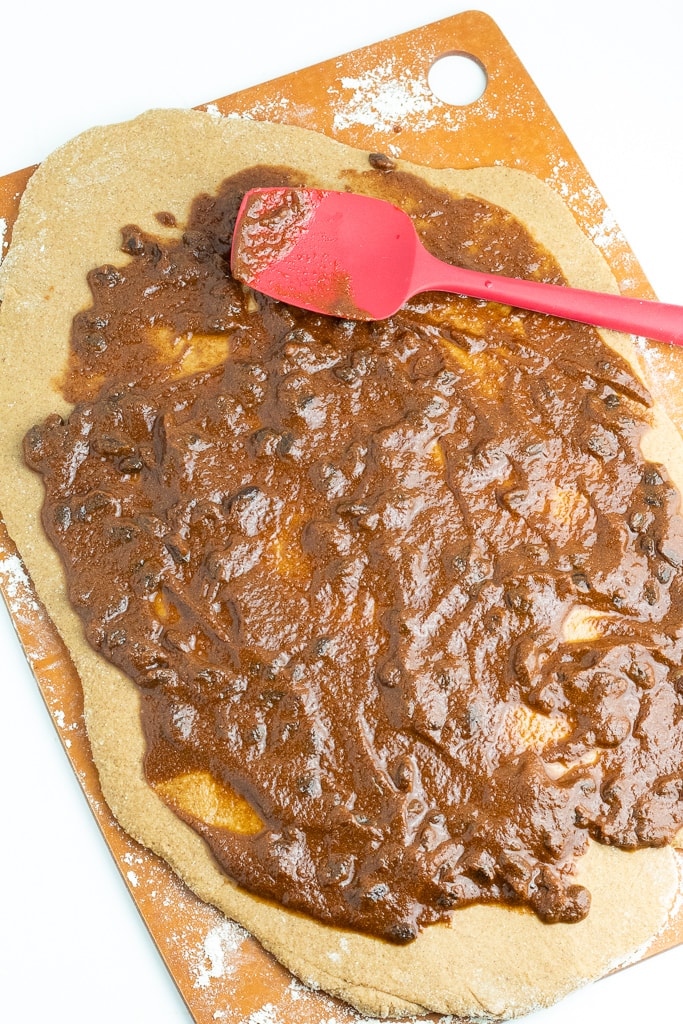
STEP #9: Once the dough has been flattened out into a thin rectangle, spoon the filling mixture into the center of it and begin to spear it around leaving about a 1/2″ edge clear.
STEP #10: Gently begin to roll the dough up. You’ll notice that the filling tries to squish out, so you will need to lift the roll, as it becomes heavier, up and over each rolling motion to keep the filling in it. If it is rolled too tightly, the filling will be squished out, so keep a firm but gentle hand on it.
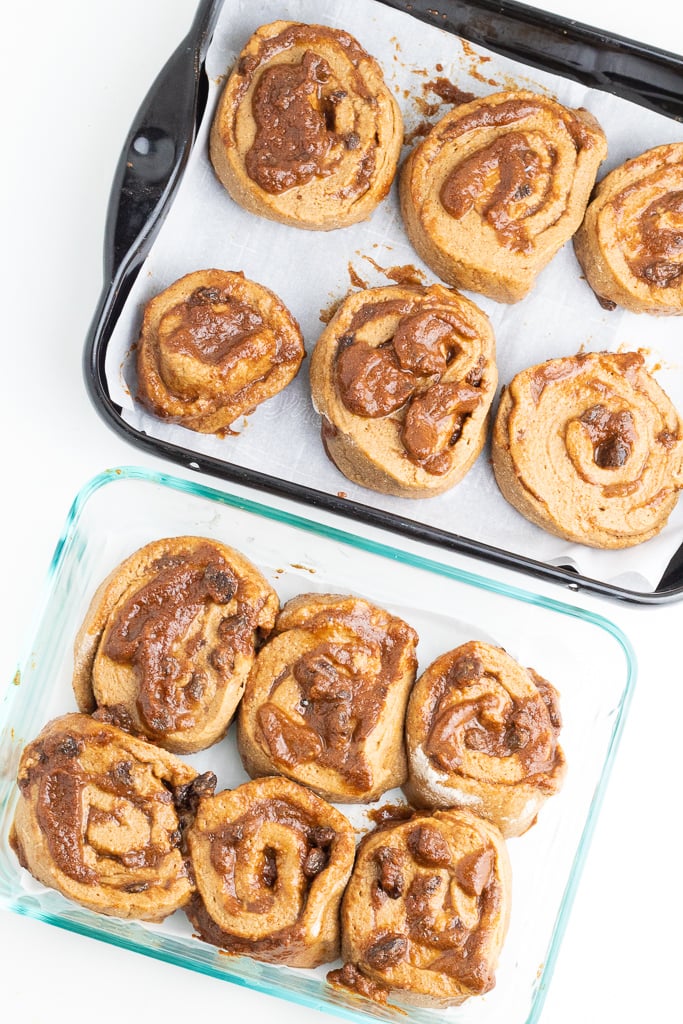
STEP #11: Use a sharp knife to cut the roll into about 12 buns. Don’t press the knife down into the dough but rather use a gentle light sawing motion back and forth. It’s very important that your knife is sharp so the dough won’t get all mashed up.
With each cut that separates a new bun, use the flat side of your knife to lift the bun up and place it on your baking dish that is lined with parchment paper. Once it’s placed in the baking dish, use your fingers to form it into a round shape if necessary. Continue doing this until all of the buns are cut and in the baking dish.
STEP #12: Bake at 325°F for approximately 20-25 minutes until golden brown on top. Be careful not to overbake. Remove from the oven and allow the cinnamon rolls to cool a bit.
STEP #13: While the rolls are baking is the perfect time to make the icing. It’s super easy to make with only 2 ingredients.
Prepare the icing by mixing 1 cup of confectioner sugar with 1 tablespoon of plant milk. Whip it together with a whisk or hand mixer until it thickens up into a glaze, making sure to beat out any clumps.
Before anyone freaks out about using powdered sugar (aka confectioners sugar), there are a couple of things you should know. First, the icing is completely optional. Don’t make it if you don’t want to. And, second, it’s super easy to make your own Homemade Powdered Sugar using date sugar or other less refined sugar. If you’re looking for a dessert without any sugar, try my Sugar-Free Chocolate Cake.
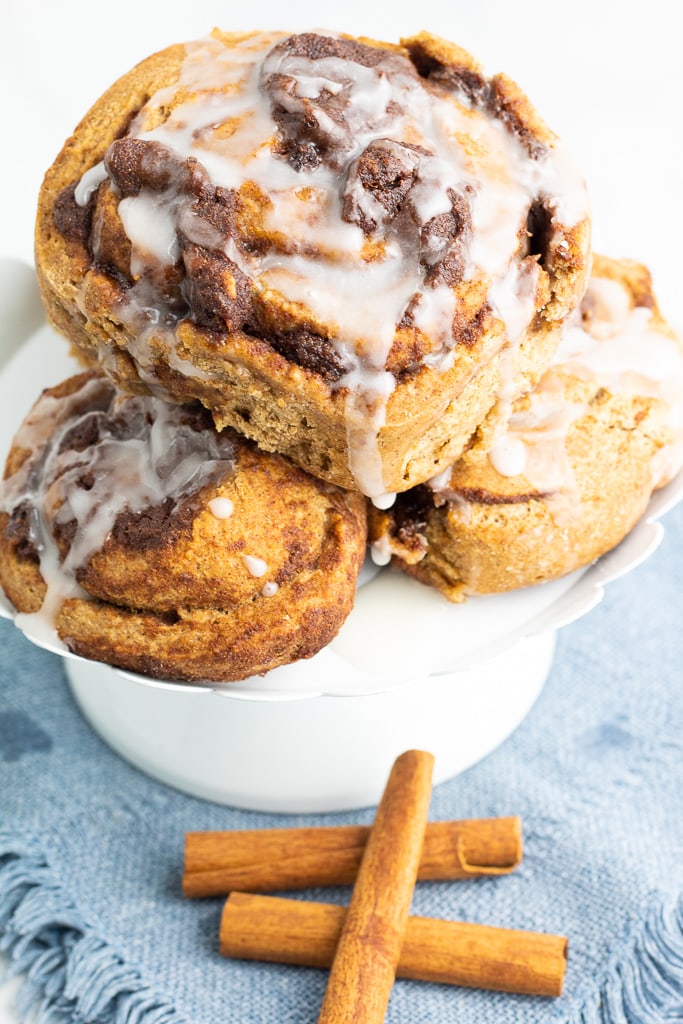
STEP #14: Drizzle the icing glaze over the top and serve while they are still warm but not hot.
Frequently Asked Questions
Though I’m sure other flours such as spelt, regular whole wheat, and other varieties can be used to make this recipe, I decided to go with whole wheat pastry flour to get the lightest consistency possible.
These will need to be kept in an airtight container to prevent them from drying out. Keep in the refrigerator for up to 5 days.
If you try this recipe, please let us know how you like it by rating it and leaving a comment. We love to hear from you!
Want to Save This Recipe?
Enter your email & I’ll send it to your inbox. Plus, get great new recipes from me every week!
By submitting this form, you consent to receive emails from EatPlant-Based
Best Vegan Cinnamon Buns
Ingredients
Dough
- 1 cup plant milk
- 3/4 cup date sugar or another sweetener
- 1 packet dry active yeast
- 3 cups whole wheat pastry flour other options below
- 2 tablespoons baking powder
- 1/2 teaspoon salt
- 2 tablespoons cinnamon
- 1/4 cup applesauce
- 2 tablespoons vanilla extract
Filling
- 1/4 cup date sugar or other sweetener
- 1.5 table spoons cinnamon
- 2/3 cup applesauce
- 6 tablespoons raisins
Icing Glaze
- 1 cup powdered sugar make your own from date sugar
- 1 tablespoon plant milk
Instructions
Making the Dough
- Don’t be afraid of this recipe due to the length of the instructions. I’m trying to be very thorough for those who have never baked before, so I am going to be a little long-winded here to make sure everyone is comfortable with the process. The outcome is so worth the effort, and it’s quite fun I think. If you are really looking for an easy dessert to try for beginners, check out my No-Bake Chocolate Pie.
- Begin by warming 1 cup of your choice of plant milk to approximately 110°F. I used almond milk but other plant milk varieties will work just as well. To do this, place the milk in a microwave-safe bowl and heat for approximately a little over 1-minute–for my microwave it was 1:15 minutes. Use a food thermometer to check the temperature.
- After heating, stir in 2 tablespoons of the sweetener of your choice and whisk together well. I use date sugar for mine.
- Next, sprinkle one packet of the active dry yeast on top of the milk mixture and allow it to sit for about 5 minutes. No need to stir it, just sprinkle the top. You’ll notice that it will bubble up a little bit (see the photo above), and this is what you want. If it doesn’t bubble up at all, the milk temperature was likely too hot or too cold. You’ll need to dump it and try again.
- While the yeast is being activated, find a large mixing bowl and add the dry ingredients to it–2.5 cups flour, 2 tablespoons baking powder, 1/2 cup sweetener, 1/2 teaspoon salt, and 2 tablespoons cinnamon–and whisk together well. I sift my flour and baking powder before adding it to the bowl to make sure it is light and fluffy, but this step is optional.
- Once the milk and yeast mixture is ready, add the vanilla and applesauce and whisk together. Then, pour the wet mixture into the larger bowl with the dry ingredients and stir with a large spoon to form a sticky dough.
- At this point, the dough will be very sticky and you’ll likely need to add a couple of tablespoons or more of flour to form it into a dough ball. You will need to use your hands to do this, so make sure to keep flour on them as well.
- Make sure there is a thin layer of flour on the bottom of your large mixing bowl underneath the dough ball to prevent it from sticking to the bottom. Cover the bowl loosely with a dishcloth and allow it to set in a warm dry place to rise. It should take about an hour to double in size. While it is rising is a good time to mix up the filling that will be layered over the dough before rolling it into buns.
- Go ahead and preheat the oven to 325°F and line a 9"x13" baking dish with parchment paper to prevent sticking. Set it to the side until needed.
- After the dough has finished rising, it’s time to knead it. To do this, sprinkle some flour on a flat surface and knead with your hands. If you’ve never kneaded dough before, this short video clip will show you how. Knead the dough for approximately 5 minutes (or 15-20 times) dusting with additional flour as needed.
- Using a floured rolling pin, roll the dough out into a large, thin rectangle (approximately 1/4" thick) or as close as you can get to it. If the dough sticks to your rolling pin, dust the top with a little more flour.
The Filling
- I like to make the filling while the dough is rising and just set it to the side until it is needed after kneading the dough.
- In a medium-size mixing bowl, add date sugar or another sweetener, cinnamon, applesauce, and raisins, and stir together well
Rolling the Dough & Filling Up
- Once the dough has been flattened out into a thin rectangle, spoon the filling mixture into the center of it and begin to spear it around leaving about a 1/2″ edge clear.
- Gently begin to roll the dough up. You’ll notice that the filling tries to squish out, so you will need to lift the roll, as it becomes heavier, up and over each rolling motion to keep the filling in it. If it is rolled too tightly, the filling will be squished out, so keep a firm but gentle hand on it.
- Use a sharp knife to cut the roll into about 12 buns. Don’t press the knife down into the dough but rather use a gentle light sawing motion back and forth. It’s very important that your knife is sharp so the dough won’t get all mashed up. With each cut that separates a new bun, use the flat side of your knife to lift the bun up and place it on your baking dish that is lined with parchment paper. Once it’s placed in the baking dish, use your fingers to form it into a round shape if necessary. Continue doing this until all of the buns are cut and in the baking dish.
- Bake at 325°F for approximately 20-25 minutes until golden brown on top. Be careful not to overbake. Remove from the oven and allow the cinnamon rolls to cool a bit. Drizzle the icing glaze over the top and serve while they are still warm.
The Icing Glaze
- While the rolls are baking is the perfect time to make the icing. It’s super easy to make with only 2 ingredients.
- Prepare the icing by mixing 1 cup of confectioners sugar with 1 tablespoon plant milk. Whip it together with a whisk or hand mixer until it thickens up into a glaze, making sure to beat out any clumps.
- Before anyone freaks out about using powdered sugar (aka confectioners sugar), there are a couple of things you should know. First, the icing is completely optional. Don’t make it if you don’t want to. And, second, it’s super easy to make your own Homemade Powdered Sugar using date sugar or other less refined sugar. If you’re looking for a dessert without any sugar, try my Sugar-Free Chocolate Cake.
Video
Notes
- Flour- I like to use whole wheat pastry flour to make these cinnamon rolls, but other flours such as spelt and regular wheat flour can also be used.
- Gluten-Free Options- Though I haven’t tried these with any gluten-free flour varieties, Minimalist Baker has a great Gluten-Free Flour Guide that should help with substituting in this recipe.
- Sifting Flour- I do like to sift my flour when baking pastries because it lightens them up even more. I also have found that adding the baking powder to be sifted with the flour gets out any clumps.
- Rolling- The rolling up of the dough with the filling is the hardest part because the filling wants to ooze out. Just be gentle and lift up and over when making the next rolling motion to help keep it all in. Any filling that seeps out can be used to top the rolls with before baking.
- Applesauce- If applesauce isn’t available in your area, it’s pretty simple to make your own homemade applesauce.
- Storing- These will need to be kept in an airtight container to prevent them from drying out. Keep in the refrigerator for up to 5 days.
Nutrition
Disclaimer
To obtain the most accurate representation of the nutritional information in a given recipe, you should calculate the nutritional information with the actual ingredients used in your recipe, using your preferred nutrition calculator. You are solely responsible for ensuring that any nutritional information provided is accurate, complete, and useful.

About Terri Edwards
Hi guys! I’m the content creator behind EatPlant-Based and a licensed Food for Life instructor with the Physicians Committee for Responsible Medicine. I’m passionate about sharing healthy recipes and tips to help others care well for their health and the bodies God has given us. I’m so glad you’re here! Read More…
These are delicious. Guilt-free, too. I have made them for the last two brunches with the family. Leftovers freeze well and are just as delicious when thawed.
Hi CindyLu– I am so glad that you love the cinnamon rolls! I have tried freezing them before, so thank you for the information that they freeze well. That’s awesome!
So, I made them. They took me at least 3 hours & don’t look as good as yours, but they’re pretty tasty! I used date sugar, which makes them a lot darker than pictured here.
Next time I think I’d use date sugar only in the dough, then coarse raw sugar in the filling (for a little crunch) & white powdered sugar for the icing on top.
Perhaps actually just dusting with a sprinkle of icing sugar before serving instead of actually icing them, would be a healthier option, and still very pretty.
Thanks for this recipe. It was fun, though I don’t think I’ll be becoming a pastry chef 👩🍳 any day soon!😂😂
Hi Emma- They look delicious to me (I saw your photos of it on the T. Colin Campbell Facebook group)! 😋The date sugar definitely makes the icing darker in color. I tend to use pure cane sugar because it’s lighter. Yours look great to me. I’d say you nailed it for the date sugar version! 🙂
Cinnamon rolls on Thanksgiving and Christmas mornings has been a tradition for us. Being WFPB for 5 years m we have missed this. I was so happy to find a recipe that we can feel good about eating for a family favorite.
Debbie- Before this recipe, I hadn’t had a cinnamon roll in over 8 years, so I understand what you mean. Hopefully, these little lovelies will bring back your family holiday morning traditions. 🙂
Hi! Can I make these ahead of time and refrigerate them until it’s time to bake them in the morning? Do you think I should allow them to rise again after being refrigerated? Thanks!
Hi Alayna- I haven’t tried making them ahead, so I can’t say for sure. I just took a peek at Chocolate Covered Kate’s recipe that inspired this one, and she says you can. The only thing is that she uses oil, so I’m not sure how that might affect it. This is what she says, “If you want hot cinnamon rolls first thing in the morning, just assemble the day before, then cover and refrigerate overnight. The next morning, simply put the pan into the oven and bake 20 minutes. Frost as desired, and serve hot. Leftovers can be covered and refrigerated for 2-3 days or frozen to reheat in the microwave or oven any time you’re craving cinnamon rolls!”