
Vegan Whipped Cream (Low-Fat)
Perfectly light and fluffy, this Vegan Whipped Cream is super easy to make with only 3 ingredients and a hand mixer. It makes a fabulous topping for pies, cakes, and even hot cocoa!

Want to Save This Recipe?
Enter your email & I’ll send it to your inbox. Plus, get great new recipes from me every week!
By submitting this form, you consent to receive emails from EatPlant-Based
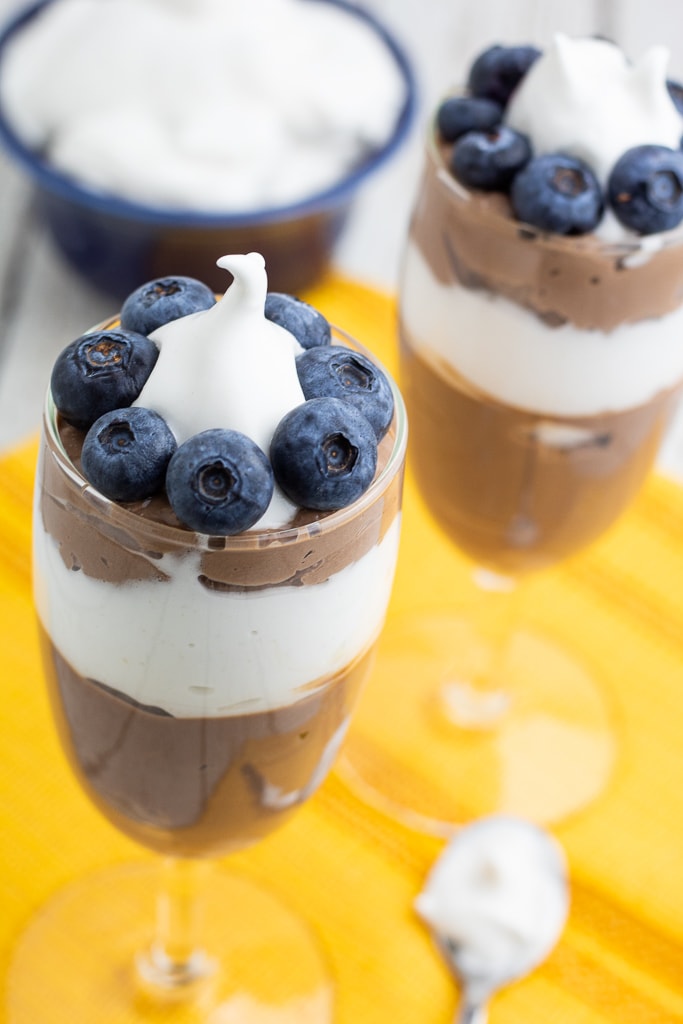
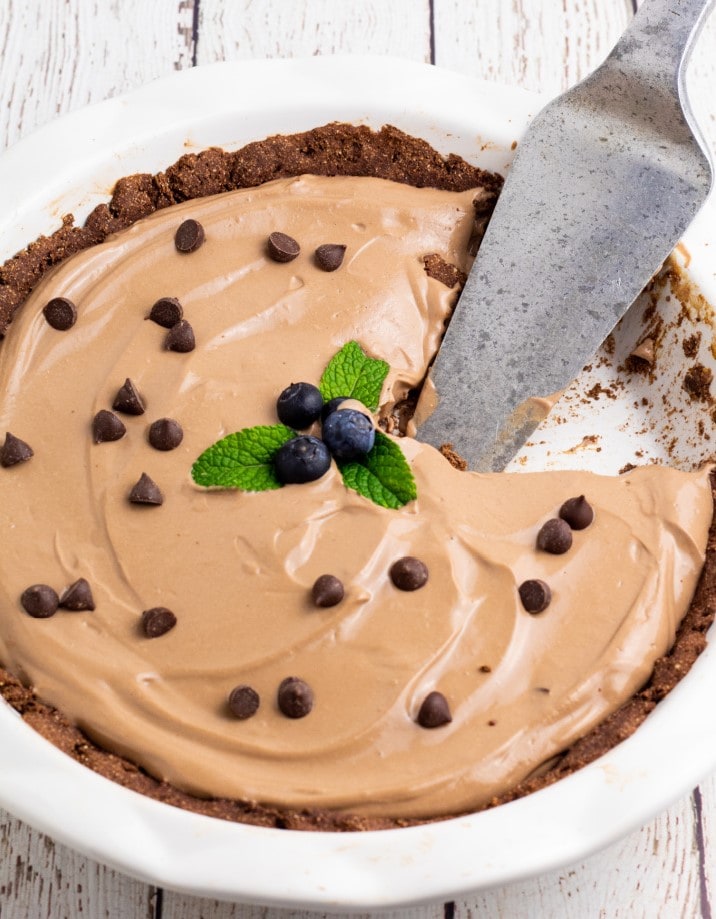
This whipped cream is so delicious that absolutely no one will know that it’s a dairy-free substitute for the traditional whipped cream that’s loaded with fat. We use it to top healthy vegan chocolate mousse and even no-bake fruit pies.
Most dairy-free whipped creams use cashew milk, but this version, inspired by NoraCooks, is much lower in fat and actually uses aquafaba which is juice from a can of chickpeas (or make your own chickpeas in an Instant Pot).
Reasons you will love this recipe
- Light and Fluffy Texture: This low-fat vegan whipped cream made with aquafaba offers a light and airy texture that mimics traditional whipped cream, providing a perfect topping for your desserts.
- Low in Fat and Calories: Made with aquafaba, this whipped cream is significantly lower in fat and calories compared to dairy-based options, making it a healthier choice for those watching their fat intake.
- Simple and Natural Ingredients: Using just aquafaba, a natural byproduct of chickpeas, and a few additional ingredients, this recipe is easy to prepare and free from artificial additives or processed ingredients.
- Versatile and Delicious: This vegan whipped cream is versatile and can be flavored with vanilla, cocoa, or spices, making it a delightful addition to a variety of desserts, from cakes and pies to fruit and coffee beverages.
Ingredients you will need
- Aquafaba- (aka chickpea juice) Using aquafaba to make vegan whipped cream is an excellent choice because it mimics the texture and stability of whipped egg whites without using animal products. Aquafaba whips up into a light, airy foam that holds its shape well, making it a perfect substitute for traditional whipped cream.
- Cream of tartar- Used to stabilize vegan whipped cream made with aquafaba by helping the aquafaba maintain its airy texture and structure. It prevents the whipped cream from collapsing or deflating, ensuring a light and fluffy consistency that holds up well over time.
- Powdered sugar- Sweetens the whipped cream while also contributing to its smooth texture. Unlike granulated sugar, powdered sugar dissolves easily, preventing any gritty texture and ensuring a creamy consistency. Use pure cane sugar or other less refined sugar to make your own powdered sugar.
What is aquafaba?
Aquafaba is the liquid found in a can of chickpeas or the cooking liquid from boiling chickpeas. It has a viscous consistency and can be whipped into a foam, making it an excellent egg white substitute in vegan recipes. It’s commonly used to create meringues, mousses, and whipped creams, providing a similar texture and stability to traditional egg-based products.
Tips and substitutions
- Serving size- This recipe makes nearly 3 cups of whipped cream, so don’t be fooled by the bean juice thinking it won’t be enough. A serving size is 3 tablespoons.
- Sweetness- If you like it really sweet, use 3/4 cup powdered sugar instead of 1/2 cup.
- Cream of tarter- If you don’t have cream of tartar on hand, it can be left out. It just helps make the cream a little more fluffy.
- Firmness- The longer you use the hand mixer to whip the cream, the more firm it will be.
How to make vegan whipped cream
The recipe card at the bottom of the page has the full list of ingredients with measurements and instructions.
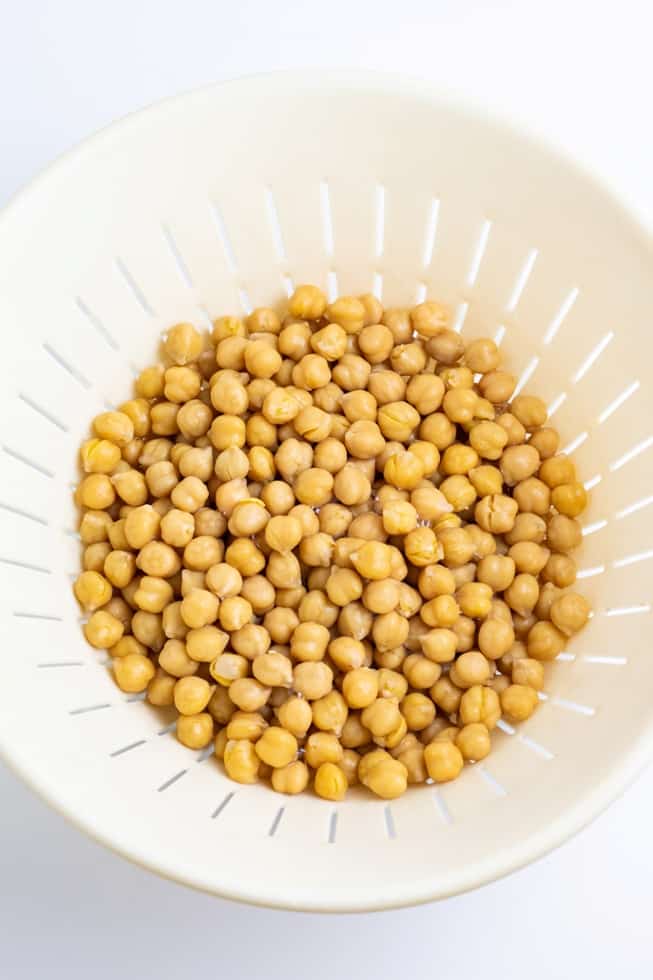
STEP #1: This recipe begins with aquafaba chickpea juice, so you can either use the canned variety or make your own Instant Pot chickpeas which is super easy to do.
I have found that canned chickpeas have about 3/4 cup of juice which is perfect for this recipe. Anywhere from 1/2 cup to 3/4 cup is great.
Begin by draining the juice from the chickpeas and placing it in a mixing bowl. Save those beans to use later in my Chickpea Avocado Salad that makes the best sandwich ever, or try some of these other Chickpea Recipes.
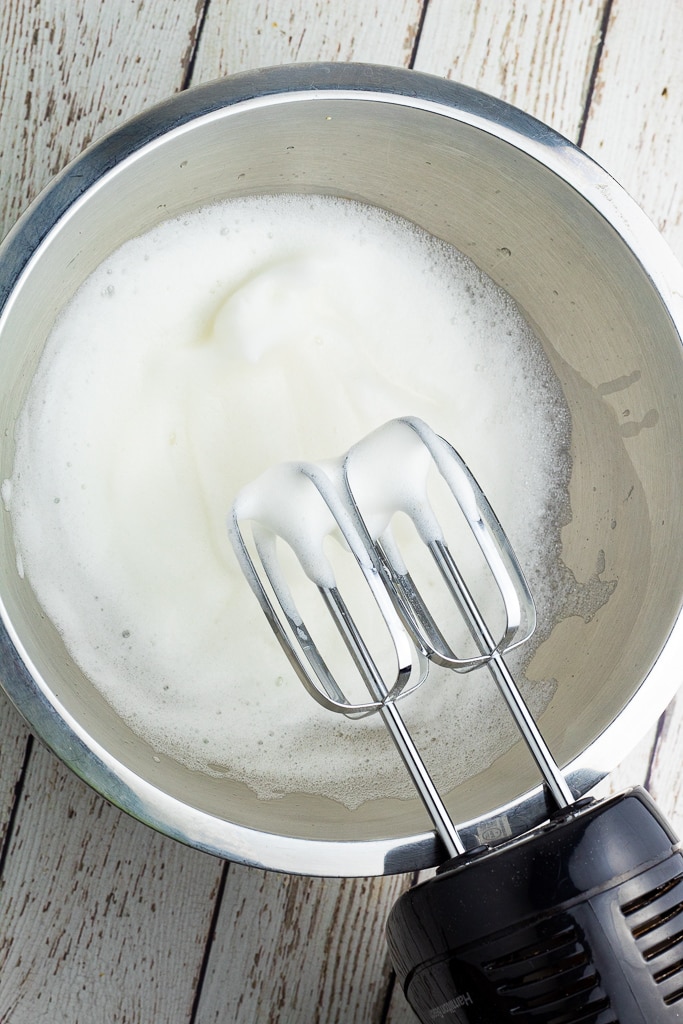
STEP #2: Next, add the cream of tartar and use a hand mixer to whip the two ingredients together until it gets foamy.
This will take about 4-5 minutes to get to the right consistency.
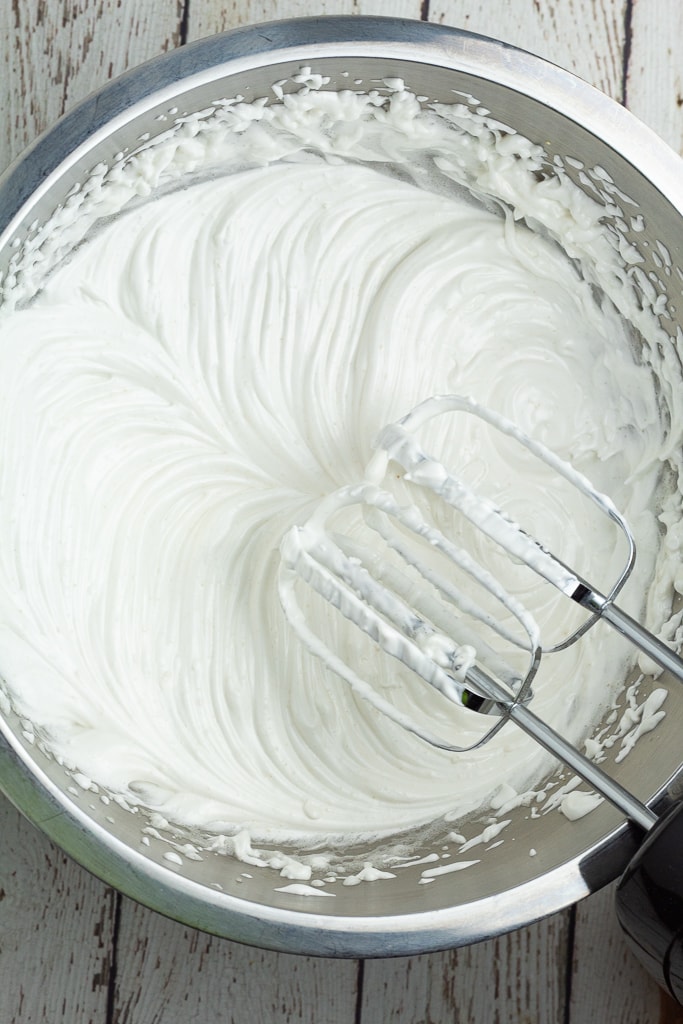
STEP #3: Add in 1/2 cup of powdered sugar and whip another minute or two until it’s nice and fluffy.
I know powdered sugar isn’t a healthy food, but did you know you can make your own using date, coconut, or other less refined sugars? Making your own powdered sugar takes only a couple of minutes. Just be aware that the darker sugars will make this whipped topping less white. Personally, I like to use pure cane sugar to make powdered sugar due to the slightly lighter color.

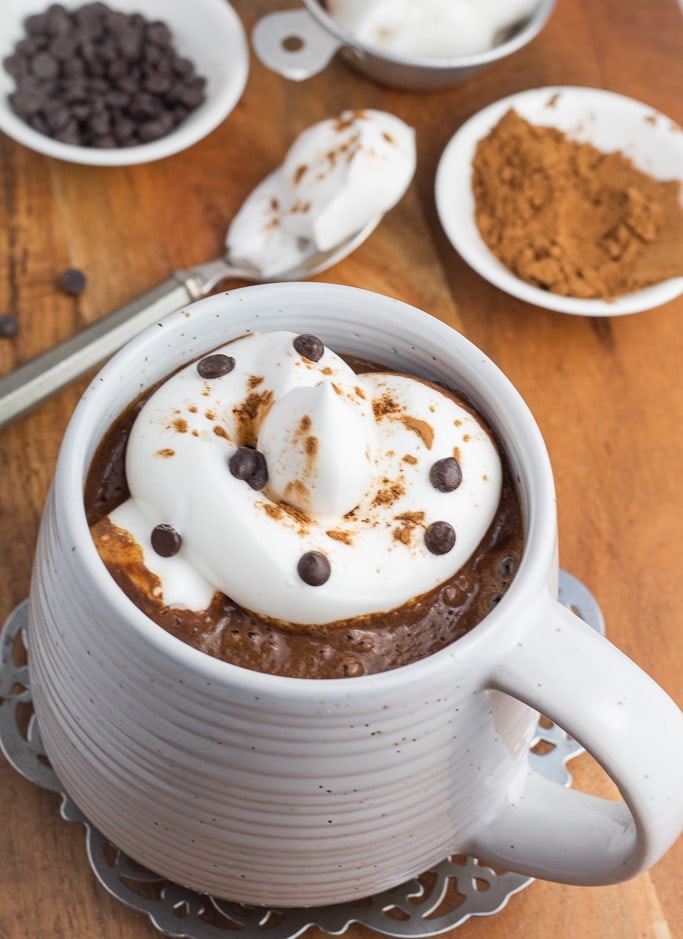
STEP #4: Dollop onto your favorite desserts or cocoa to turn them into something friends and family will rave about. Then, you can tell them it’s made with bean juice, but I don’t think they’re going to believe you.
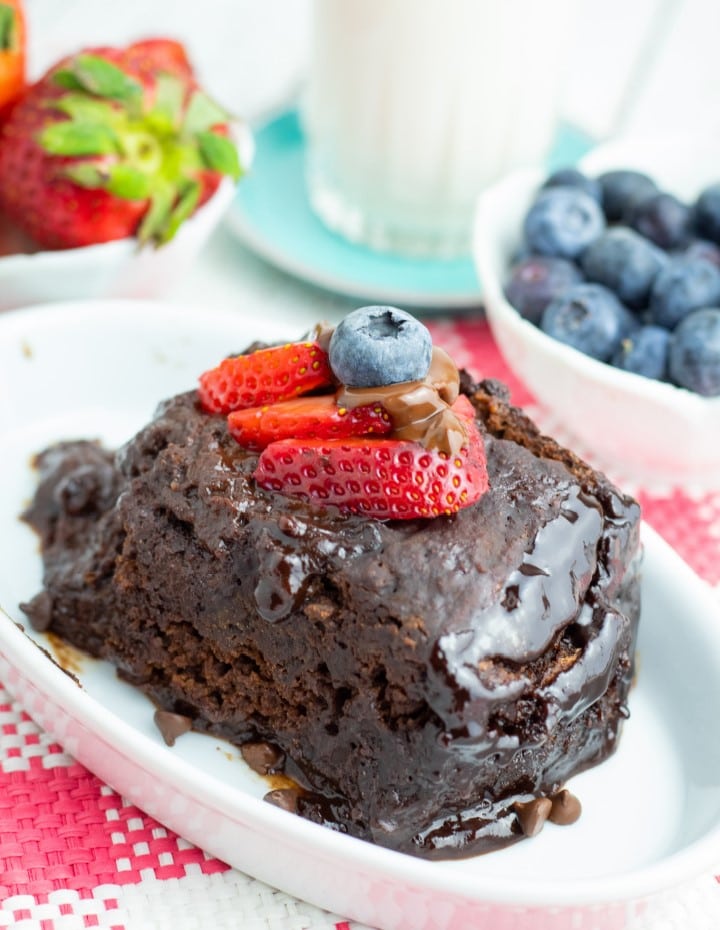
It is so easy to make this perfectly light topping, and it kicks so many other dessert recipes like Tofu Chocolate Mousse and Crockpot Lava Cake up to a whole new level. Dollop your favorite vegan pies with it and that cup of herbal coffee and Vegan Hot Cocoa too!
Frequently Asked Questions
No. While aquafaba can technically be derived from various beans, chickpea aquafaba is most commonly used because it has the best whipping properties and neutral flavor. Other bean aquafabas may not whip as well or may affect the flavor of your whipped cream.
If your aquafaba isn’t whipping properly, ensure that it’s at room temperature and your mixing bowl and beaters are completely clean and dry. Adding a small amount of cream of tartar can also help stabilize the foam. Additionally, make sure you’re using aquafaba from chickpeas and not from other beans, as chickpea aquafaba has the best whipping properties.
Mine keeps in the refrigerator for about a day before it starts to lose its fluff. I haven’t tried freezing it yet but have heard that it will have about the same consistency as frozen cool whip which sounds delicious to me.
Recipes To Use Whipped Cream

For those of you new to the whole food plant-based lifestyle, we’ve created a FREE 7-Day Plant-Based Menu Planner to help you get started!
If you try this recipe, please let us know how you like it by rating it and leaving a comment. We love to hear from you!
Want to Save This Recipe?
Enter your email & I’ll send it to your inbox. Plus, get great new recipes from me every week!
By submitting this form, you consent to receive emails from EatPlant-Based

Vegan Aquafaba Whipped Cream
Ingredients
- 1/2 cup aquafaba chickpea liquid from can or fresh
- 1/8 teaspoon cream of tartar
- 1/2 cup powdered sugar make your own from date, coconut, or other sugar
Instructions
- This recipe begins with aquafaba chickpea juice, so you can either use the can variety or make your own which is super easy to do in an Instant Pot. I have found that canned chickpeas have about 3/4 cup of juice which is perfect for this recipe. Anywhere from 1/2 cup to 3/4 cup is great.
- Begin by draining the juice from the chickpeas and placing it in a mixing bowl. Save those beans to use later in my Chickpea Avocado Salad that makes the best sandwich ever, or try some of these other Chickpea Recipes.
- Next, add the cream of tartar and use a hand mixer to whip the two ingredients together until it gets foamy. This will take about 4-5 minutes to get to the right consistency. See my photos to get a visual of what you’re looking for.
- Add in 1/2 cup of powdered sugar and whip another minute or so until it’s nice and fluffy. The longer you whip it, the stiffer the peaks will be.
- I know, powdered sugar isn’t a health food, but you can make your own using date, coconut, or other less refined sugars. Personally, I like to use Pure Cane Sugar due to the slightly lighter color.
- Dollop onto your favorite desserts or cocoa to turn them into something friends and family will rave about. Then, you can tell them it’s made with bean juice, but I don’t think they’re going to believe you.
- Mine keeps in the refrigerator for about a day before it starts to lose its fluff. I haven’t tried freezing it yet but have heard that it will have about the same consistency as frozen cool whip which sounds delicious to me.
Video
Notes
- Serving size- This recipe makes nearly 3 cups of whipped cream, so don’t be fooled by the bean juice thinking it won’t be enough. A serving size is 3 tablespoons.
- Sweetness- If you like it very sweet, use 3/4 cup powdered sugar instead of 1/2 cup.
- Cream of tarter- If you don’t have the cream of tartar on hand, it can be left out. It just helps make the cream a little more fluffy.
- Firmness- The longer you use the hand mixer to whip the cream, the more firm it will be.
- Storage- Keep in an airtight container in the refrigerator for up to 24-hours.
- Uses- Dollop onto hot drinks like vegan hot cocoa or herbal coffee to add a little sweetness, especially during the holidays.
Nutrition
Disclaimer
To obtain the most accurate representation of the nutritional information in a given recipe, you should calculate the nutritional information with the actual ingredients used in your recipe, using your preferred nutrition calculator. You are solely responsible for ensuring that any nutritional information provided is accurate, complete, and useful.

About Terri Edwards
Hi guys! I’m the content creator behind EatPlant-Based and a licensed Food for Life instructor with the Physicians Committee for Responsible Medicine. I’m passionate about sharing healthy recipes and tips to help others care well for their health and the bodies God has given us. I’m so glad you’re here! Read More…
The nutrition is incorrect. It is 8 gram of Carbs, not fat, per serving (There is no fat in this recipe). That would be 32 Cal per 3 tablespoon serving.
Stupid question: can a stand mixer be used? I don’t have a hand mixer.
Patricia- I’m sure a stand mixer would work just fine for this recipe. Enjoy!
Worked well but after sitting in fridge for a couple hours there was a tan liquid in bottom of bowl. Is this normal or did I not mix enough. Had plenty to use on pumpkin pie.
Hi Charlene- Did you use date sugar? It seems that the date sugar has a tendency to do that but if you use other sugars to make the powdered sugar such as sucanat or pure cane it doesn’t happen.
Hi Terri! LOVE your blog!!!The intro to this post says blender, the recipe and tips section says to use a hand mixer? Can either be used?
Hi Shawna- Oh, great catch! A hand mixer would work best for this recipe. Thank you for letting me know about the typo. I’m so used to typing ‘blender,’ I must’ve been on autopilot. LOL!