
Roasted Butternut Squash (Whole)
Making Roasted Butternut Squash is super easy and quick, especially if you bake it whole in the oven. It’s a great healthy and versatile side dish any time of the year!
Want to Save This Recipe?
Enter your email & I’ll send it to your inbox. Plus, get great new recipes from me every week!
By submitting this form, you consent to receive emails from EatPlant-Based
I know many people think of butternut squash as a fall or winter food, but why is that? These lovely squashes are available in many grocery stores all year round, so I see absolutely no reason to limit when you eat them, especially when there are so many health benefits as well.
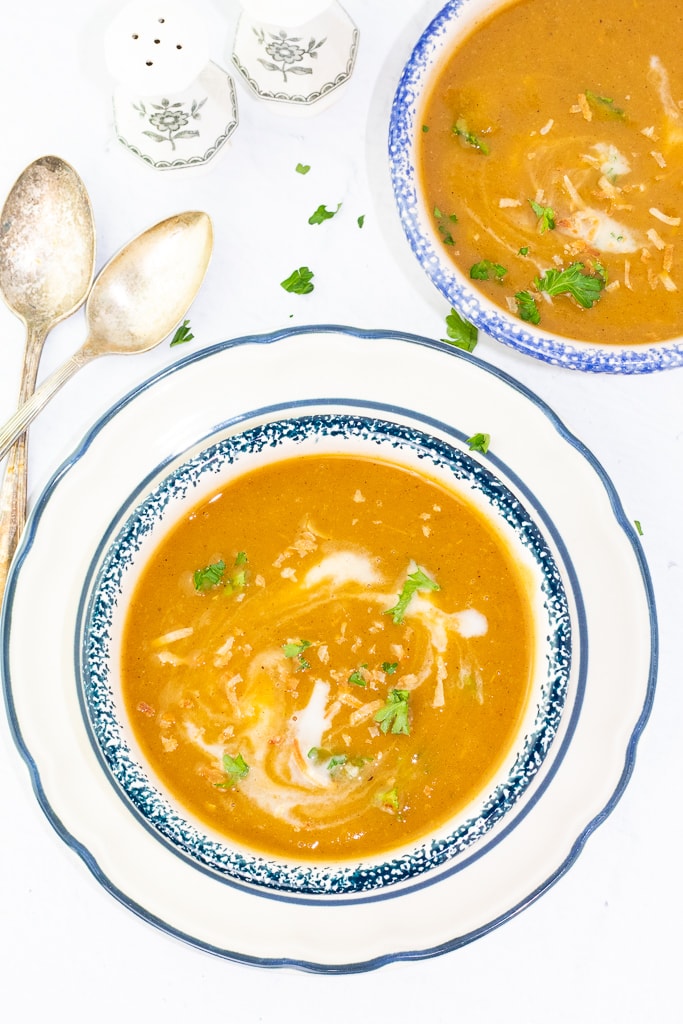
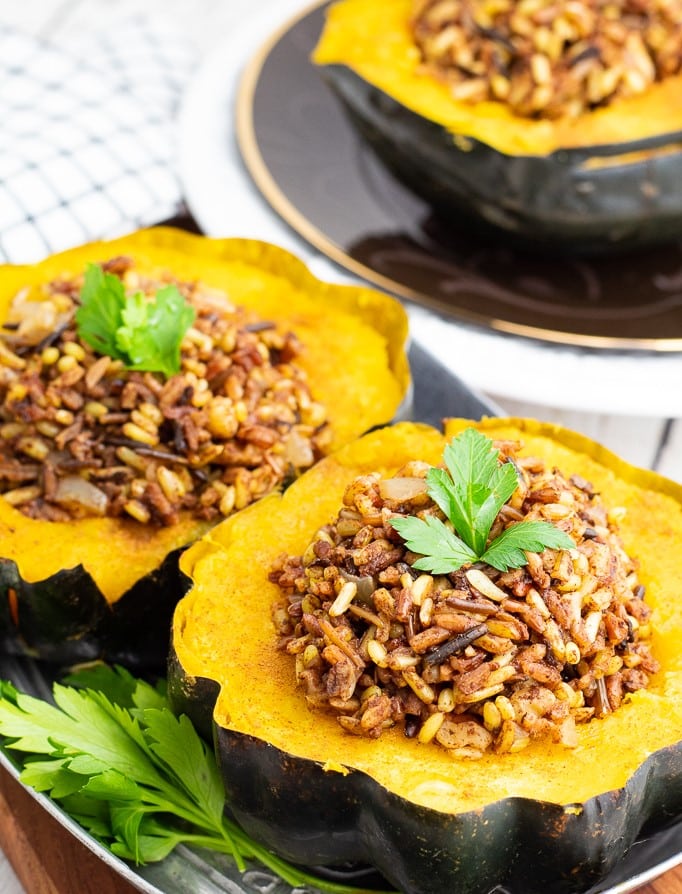
If you love butternut squash as I do, you’re going to love this roasted butternut squash recipe. You’ll also want to try my creamy butternut squash soup which is perfect when paired with a garden salad or pasta salad. We have more healthy squash recipes on this website, like my stuffed vegan acorn squash and this oil-free baked zucchini and yellow squash recipe.
What is butternut squash?

Butternut squash is a winter squash which is interesting since it’s grown in the summer and harvested in the fall. It is long and oval in shape with a bell bottom. The outer cover is usually a pale yellow-beige color, and the inside flesh is bright orange.
The taste is similar to sweet potatoes but nuttier in flavor, and it’s used in soups, stews, and other healthy side dishes. I happen to love squash of all kinds as you can see from this list of my favorite Fabulous Vegan Squash Recipes.
This amazing vegetable is loaded with fiber and other nutrients and is very low in calories and fat. And, we know that eating plant foods like butternut squash can decrease the risks of obesity, diabetes, heart disease, and other chronic medical conditions.
Reasons you will love this recipe
- Effortless Preparation: Roasting butternut squash whole saves time on peeling and chopping, making it an easy and hassle-free way to enjoy this delicious vegetable.
- Naturally Sweet and Flavorful: Roasting enhances the natural sweetness of butternut squash, creating a rich, caramelized flavor perfect for soups, salads, or as a side dish.
- Healthy and Nutritious: Butternut squash is packed with vitamins A and C, fiber, and antioxidants, making this recipe a nutritious addition to any meal.
Why bake it whole?
Most recipes for cooking butternut squash and other squash varieties tell you to cut them first and deseed them. The problem with this method is that they are so tough to cut. Their outer skin is thick and difficult to slice.
To me, it is much easier to just bake it whole in the oven and slice and deseed it once it’s nice and tender. Keeping it whole while it cooks also helps hold in the moisture, which I like.
How to roast butternut squash whole
The recipe card at the bottom of the page has the full list of ingredients with measurements and instructions.
STEP #1: Preheat oven to 400 degrees. To begin, make sure to wash the outside of your large butternut squash. You’re not going to eat the peelings, but just think about how many hands have touched it and where all it has been. It’s better to make sure it is clean.
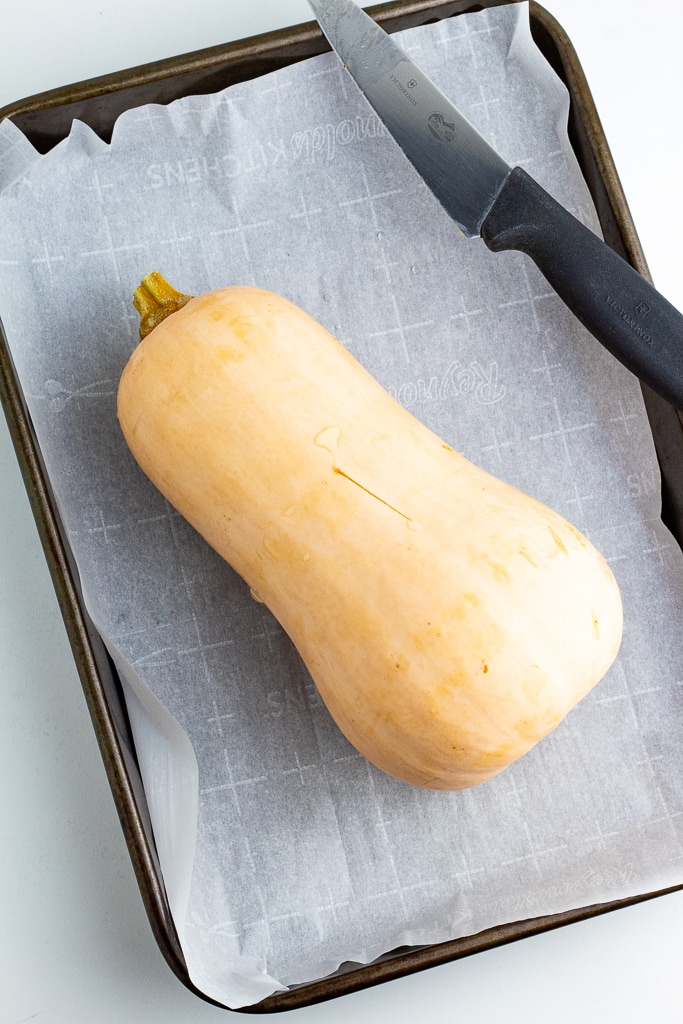
STEP #2: Use a sharp knife to carefully poke about 5-6 holes in the squash. This is to make sure it doesn’t explode in the oven.
Place the squash on a sheet pan. I line mine with parchment paper to keep from having to wash the pan. All of the juices fall on it and not my pan which means I only have to wipe it out when done.
I am often asked which knives I use personally, and I have to say that it is Victorinox. They are the same company that makes Swiss Army Knives and the quality is excellent.
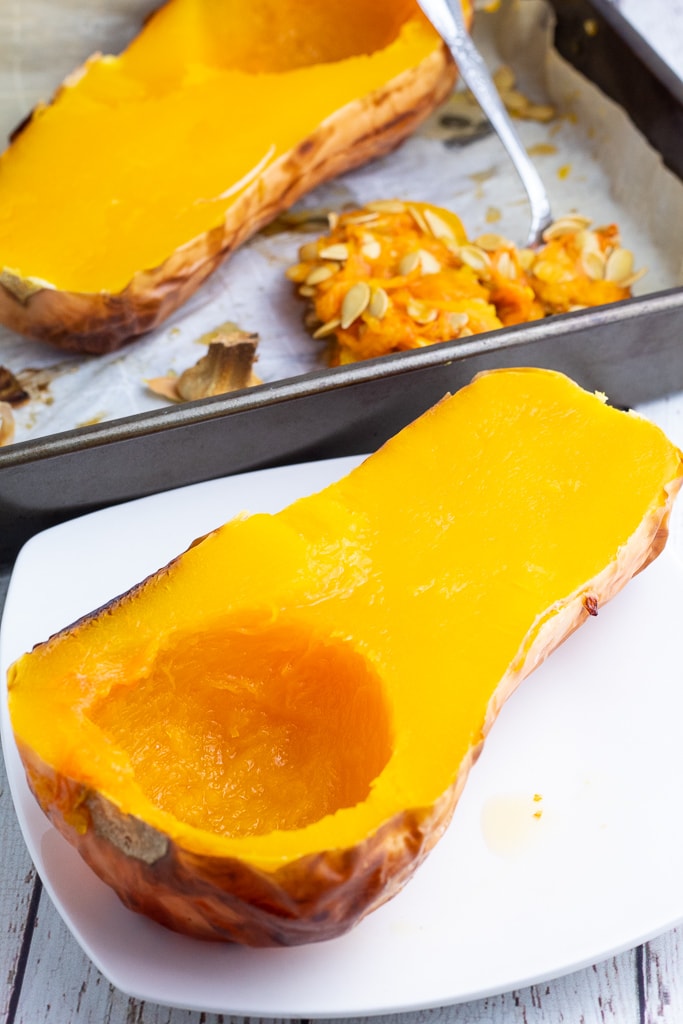
STEP #3: Place in your preheated oven, and bake at 400°F for approximately 60-80 minutes or until it is tender when pierced with a knife. The cooking time will vary depending on the size of your squash. Larger ones take longer to get tender.
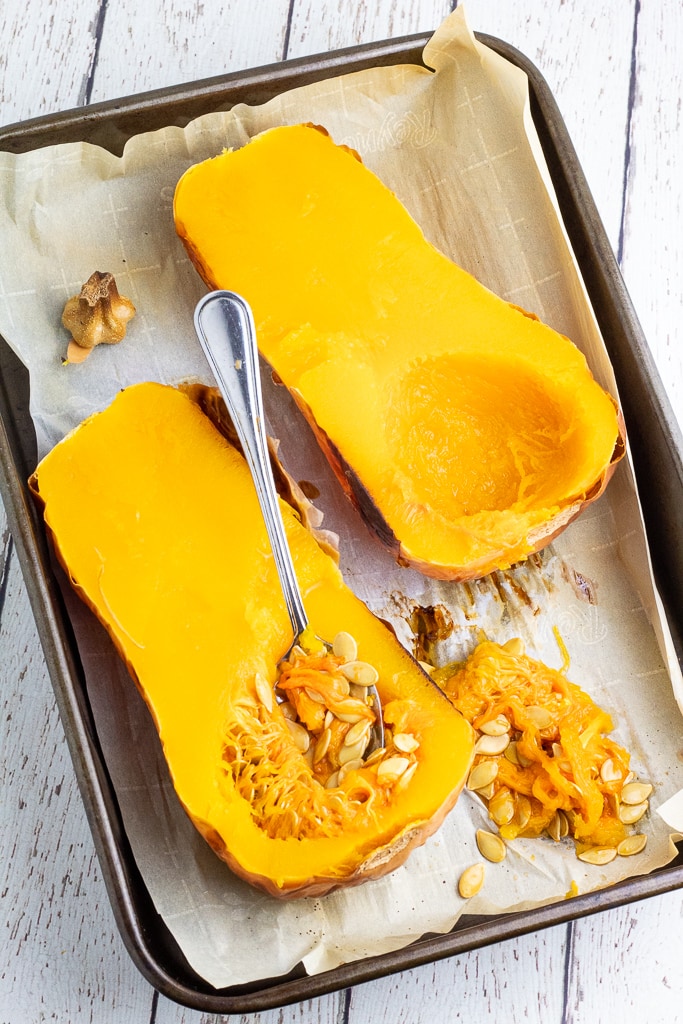
Once it is fully cooked and fork-tender, remove it from the oven and allow it to cool. You will notice how easily it can now be sliced, and only a spoon is needed to remove the seeds. There will be strings surrounding the seeds, and they will need to be scooped out as well.
Serving suggestions
- Eat the cooked squash as is or sprinkle with a little cinnamon and salt, and drizzle some maple syrup over the top. Other great herbs and spices include sea salt, pepper, onion powder, and garlic powder.
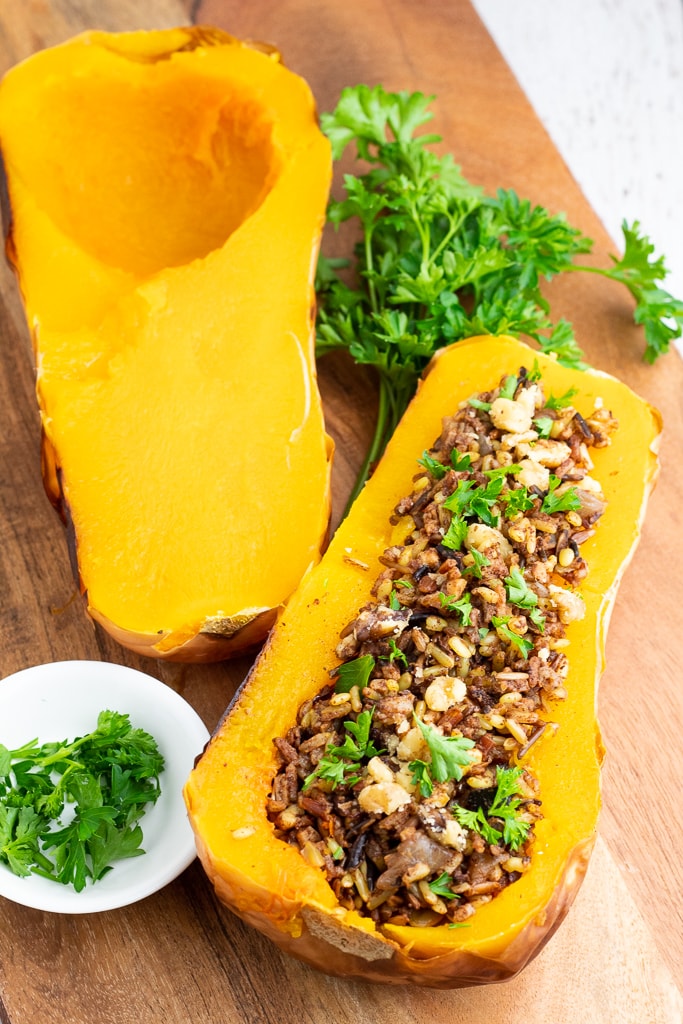
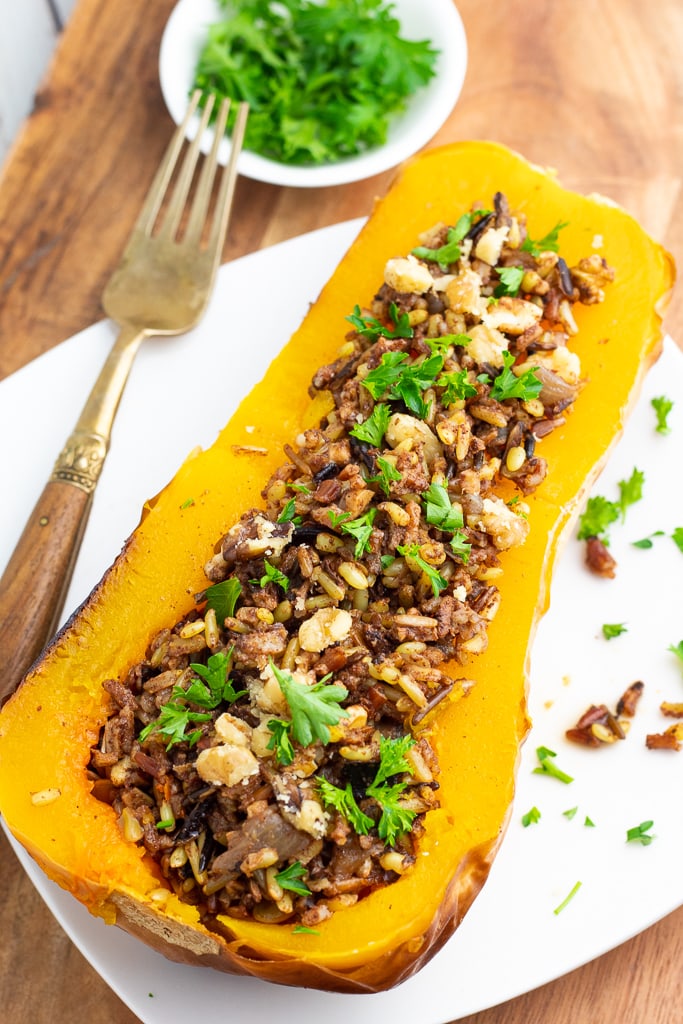
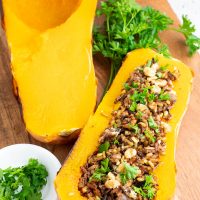
- Make a little bit of Wild Rice Stuffing, and fill it full to make a beautiful and filling dish during the holiday or any time of year. For more holiday recipes, take a peek at these 21 Vegan Holiday Recipes.
Other cooking methods
Though baking it whole is my favorite way to cook butternut squash, it can also be cooked using other methods.
- Slice and Bake– Some people prefer to slice the raw squash and scoop out the seeds before cooking. Once it’s sliced, place it cut-side down on a baking sheet to help it contain some of the moisture. However, some people prefer to bake theirs with the cut size up.
- Instant Pot- Place the trivet inside your Instant Pot and then add one cup of water and the whole clean butternut squash. Lock the lid down, slide the steam valve to SEAL, and set it to MANUAL for approximately 25 minutes. Once the cooking cycle is finished, leave it to allow for a natural release for about 10 minutes. Next, slide the valve to VENT and allow the rest of the pressure to be released.
- Microwave– Prepare the squash by cutting it in half and scraping out the seeds same as above. Place it face-side down on a microwave-safe pan or plate and cook on high for 6-10 minutes until it can be easily pierced with a fork.
- Steam– Cut and prep as described above. Cut the squash into slices that will fit into a steamer basket. Place the steamer basket into a stockpot filled with water to just below the basket. Add the squash chunks and steam for approximately 20 minutes until the flesh is tender when poked with a fork.
- Saute– Peel and deseed the squash and slice it into bite-size chunks. Add a little veggie broth and the chunks to a nonstick saute pan and cover. Flip them occasionally until they are tender which should take about 15-20 minutes depending on the size of the chunks. Add more veggie broth as needed to prevent sticking.
Frequently Asked Questions
No, you can roast butternut squash with the skin on. After roasting, the skin softens, making it easy to scoop out the flesh or peel the skin away if desired.
Yes, poking a few holes in the squash before roasting allows steam to escape and helps the squash cook more evenly.
Yes, roasted butternut squash can be prepared in advance. After roasting, let it cool, then store it in an airtight container in the fridge for up to 5 days or freeze for later use.
The squash is fully cooked when you can easily insert a fork or knife into the thickest part of the squash, and the flesh is soft and tender.
More Healthy Squash Recipes


For those of you new to the whole food plant-based lifestyle, we’ve created a FREE 7-Day Plant-Based Menu Planner to help you get started!
If you try this recipe, please let us know how you like it by rating it and leaving a comment. We love to hear from you!
Want to Save This Recipe?
Enter your email & I’ll send it to your inbox. Plus, get great new recipes from me every week!
By submitting this form, you consent to receive emails from EatPlant-Based
Roasted Butternut Squash (Whole)
Ingredients
- 1 whole butternut squash
- 1 teaspoon ground cinnamon optional
- 1 teaspoon maple syrup optional
Instructions
- To begin, make sure to wash the outside of your squash.
- Next, use a sharp knife to carefully poke about 5-6 holes in the squash. This is to make sure it doesn’t explode in the oven.
- Place it on a baking sheet or pan. I line mine with parchment paper to keep from having to wash the pan. All of the juices fall on it and not my pan which means I only have to wipe it out when done.
- Bake at 400°F for approximately 60-80 minutes or until it is tender when pierced with a knife. The cooking time will vary depending on the size of your squash. Larger ones take longer to get tender.
- Once it is fully cooked, remove it from the oven and allow it to cool.
- You will notice how easily it can now be sliced, and only a spoon is needed to remove the seeds. There will be strings surrounding the seeds, and they will need to be scooped out as well.
- Eat the cooked squash as is or sprinkle with a little cinnamon and salt and drizzle some maple syrup over the top. Or, make a little bit of Wild Rice Stuffing, and fill it full to make a beautiful and filling dish during the holiday or any time of year.
Video
Notes
Nutrition
Disclaimer
To obtain the most accurate representation of the nutritional information in a given recipe, you should calculate the nutritional information with the actual ingredients used in your recipe, using your preferred nutrition calculator. You are solely responsible for ensuring that any nutritional information provided is accurate, complete, and useful.

About Terri Edwards
Hi guys! I’m the content creator behind EatPlant-Based and a licensed Food for Life instructor with the Physicians Committee for Responsible Medicine. I’m passionate about sharing healthy recipes and tips to help others care well for their health and the bodies God has given us. I’m so glad you’re here! Read More…
Just wondering if you eat the skin 🤔?
I don’t personally eat the skin because it never gets completely soft and has a paper=like texture.
What do you serve with this?
I think rice, soup, beans, or corn on the cob would be great choices. You could also stuff it with my wild rice stuffing.
This was perfect! Thank you so much for this tip! It not only saves me money, but also my poor fingers from trying to chop the dastardly difficult squash, lol! I will be using this method from now on. I did mine in the toaster oven and it worked great and tastes amazing plain, but even better with a sprinkle of cinnamon and drizzle of maple syrup! 🙂
Hi Aimee- YAY! Saving those fingers is very important, lol. So glad this method helped and that you liked the taste too. 🙂
Is it possible to microwave the whole squash instead of baking it?
Hi Margie- Yes, I actually included a ‘Other Cooking Methods’ section in the article that gives instructions for steaming, sauteing, and microwaving. The microwave tip says, “Prepare the squash by cutting it in half and scraping out the seeds same as above. Place it face-side down on a microwave-safe pan or plate and cook on high for 6-10 minutes until it can be easily pierced with a fork.”
I agree! fast easy and delicious 😋
YAY! I’m so glad you like this easy method too!