
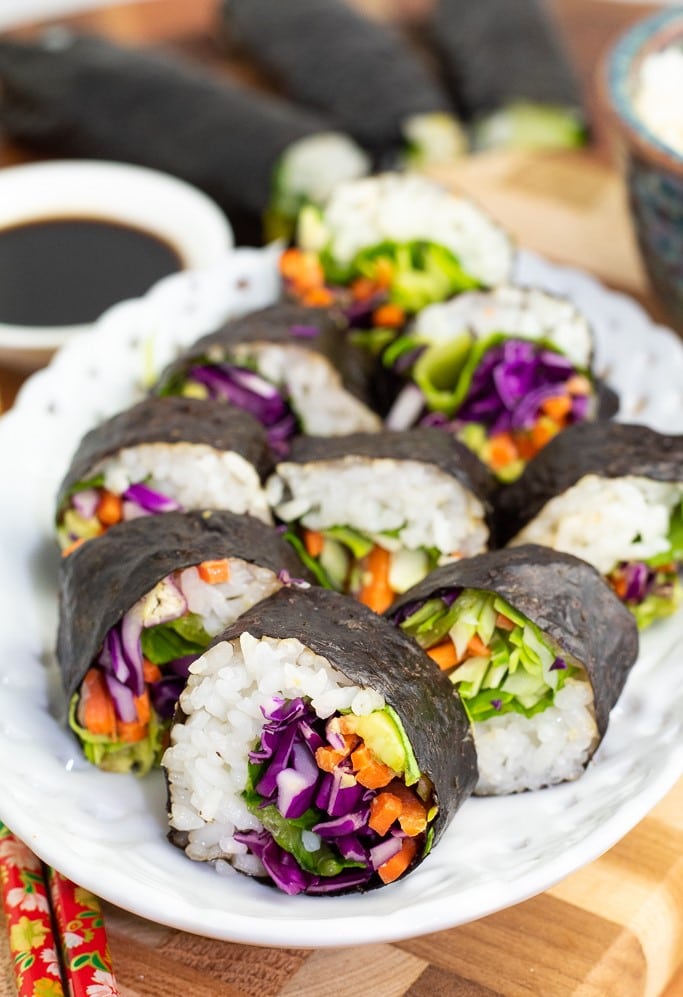
Sweet Potato Sushi Roll
This sweet potato sushi roll is a delicious vegan option, combining the natural sweetness of roasted sweet potatoes with savory sushi rice and nori for a satisfying, plant-based side dish. Perfect for sushi lovers, this roll offers a flavorful and nutritious twist on traditional sushi.

Want to Save This Recipe?
Enter your email & I’ll send it to your inbox. Plus, get great new recipes from me every week!
By submitting this form, you consent to receive emails from EatPlant-Based
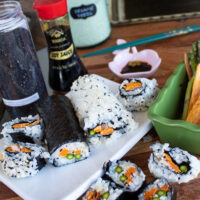
This vegan sushi is made with baked or roasted sweet potatoes, sushi rice, nori, and even other vegetables if you want to add them. It’s delicious and perfect for lunch, dinner, or snacks. To make them even more stunning, try making them with baked Okinawan purple sweet potatoes!
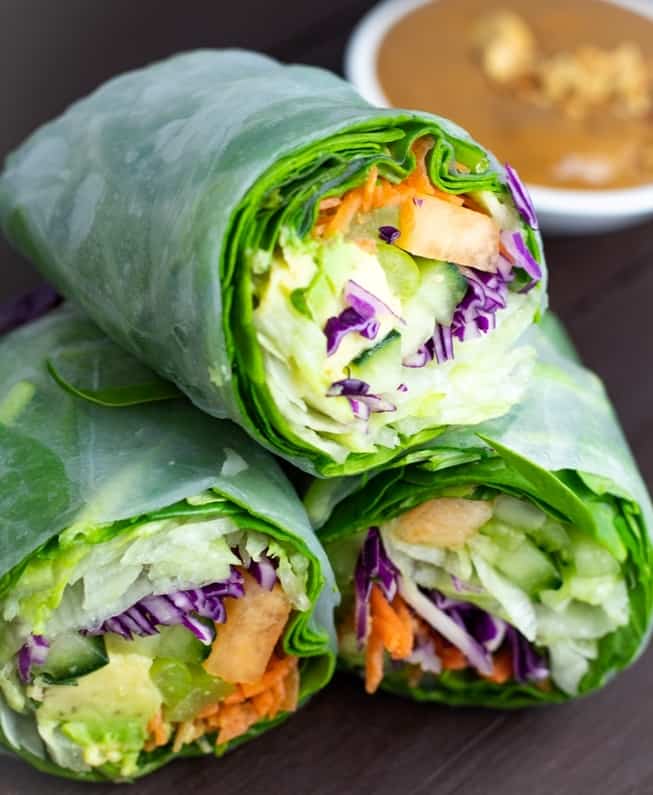
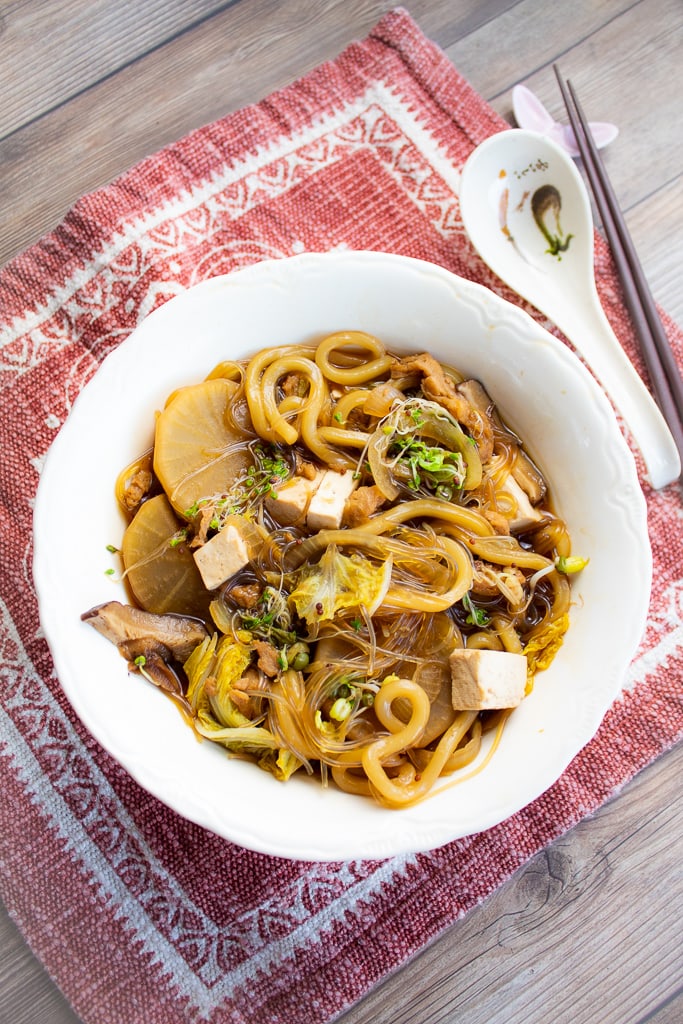
I could never bring myself to try traditional sushi made with fish because it just sounded so gross, but I can eat vegetarian sushi all day long for any meal of the day. In the past, we’ve made all kinds of variations including this delicious Easy Vegan Sushi, and they both pair well with this miso ramen vegan Japanese soup or our vegetable udon noodle soup with tofu to make a complete meal.
What is sweet potato sushi?
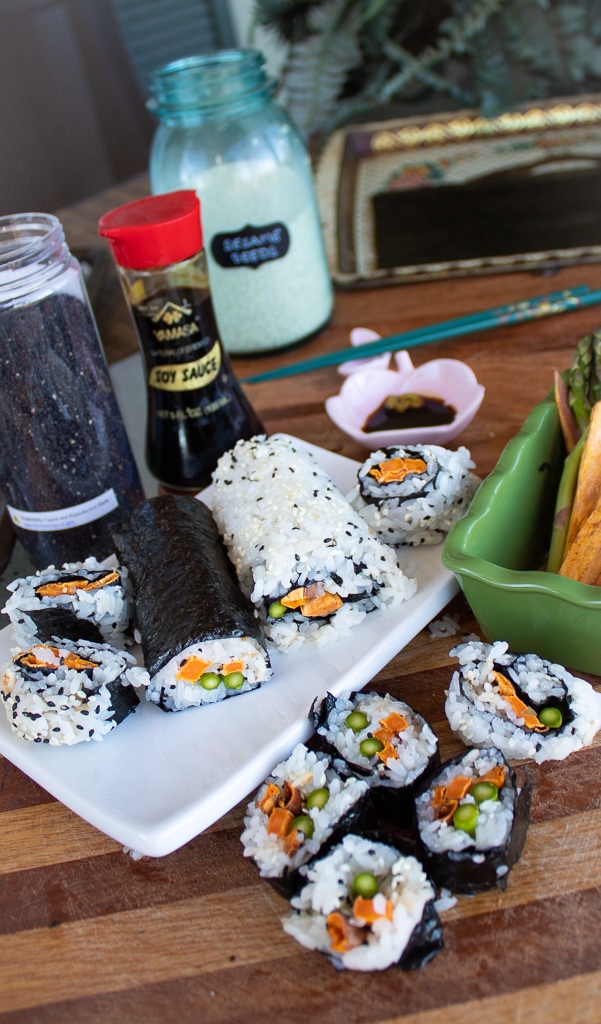
A sweet potato sushi roll is a vegan/vegetarian sushi roll that is made with cooked sweet potato slices and other vegetables (optional) that are rolled up in sushi rice and nori seaweed sheets. Oftentimes, it is drizzled with a savory tonkatsu sauce or even soy sauce and served with pickled ginger and wasabi.
Ingredients you will need
- Sweet potatoes- Baking, air frying, or roasting the sweet potatoes gives the best flavor to this vegan sushi.
- Veggies- We like to add asparagus spears for a little more color and crunch. Raw or steamed works great.
- Rice- Medium or short-grain rice is best for sushi because it’s sticky enough to hold together. Brown rice doesn’t stick as well, but there is a version of brown rice available at some Asian markets and online that does a good job. It’s called Haiga Brown Rice.
- Nori seaweed paper- These are basically edible seaweed sheets that wrap around the outside of sushi and are used with maki rolls. They are completely optional but do add a nice salty flavor.
- Sesame seeds- Uramaki is the type of roll that uses sesame seeds on the outside instead of nori sheets. They are optional for making sushi.
Tips and Suggestions
- No mess- Sliding your mat into a gallon-sized twist-tie plastic bag or covering it with plastic wrap will greatly simplify the rolling and clean-up processes.
- Rice- Haiga Brown Rice is a good option because it is short-grain and sticky.
- Damp hands- Wetting your hands often while rolling the sushi will help with the stickiness.
- Bento box- Homemade sushi is great in bento boxes for packing lunches, and they are great for picnics too.
How to make sushi rice
The recipe card at the bottom of the page has the full list of ingredients with measurements and instructions.
Short-grain (or medium-grain) rice is what you’ll need to buy to make sushi because it is sticky enough to hold together nicely. Haiga Brown Rice is a good option for brown rice because it is short-grain and sticky. This article on How to Make Sushi Rice can help explain the importance of the choice of rice.
Cooking sushi rice
STEP #1: Begin by rinsing the rice under cold water. The best way to do this is by using a rice washing bowl or a colander that is made for small grains.
My sister, the recipe creator, uses a rice steamer to cook her sushi rice, and she suggests using short or medium-grain rice. The ratio for 8 sushi rolls is 2.5 cups uncooked rice to 2.25 cups water. Below are the cooking methods using a rice steamer, Instant Pot, and stovetop.
Rice Cooking Methods:
- Rice steamer method- Place water and rice in the rice steamer and press the ‘Cook’ button or the applicable button for your model.
- Instant Pot method- Cook in your Instant Pot on high for 3 minutes and allow for a 10-minute slow release.
- Stovetop method- Cook over high heat without the lid until it comes to a boil. Cover, reduce the heat to medium-low, and allow to cook for approximately 12 minutes. Remove it from the heat, leave the lid on, and let it steam for another 10 minutes.
Whichever cooking method you use, be ready to transfer the cooked rice to a cooling pan as soon as it is done. If you are using a rice steamer, as soon as the cooker beeps, immediately transfer the rice to a cooling pan which can be as simple as a baking sheet. Be sure to have hot pads ready and be mindful of the steam.
STEP #2: While the rice cooks, go ahead and make the rice seasoning with the rice vinegar, sugar, and salt. Mix the ingredients together in a saucepan and heat on medium-high. Watch carefully, and turn the heat off when it begins to simmer. You don’t want this mixture to come to a boil.
STEP #3: When the rice has finished cooking, immediately dump it onto a baking sheet and pour the vinegar mixture over the top. Mix gently and begin spreading the rice evenly.
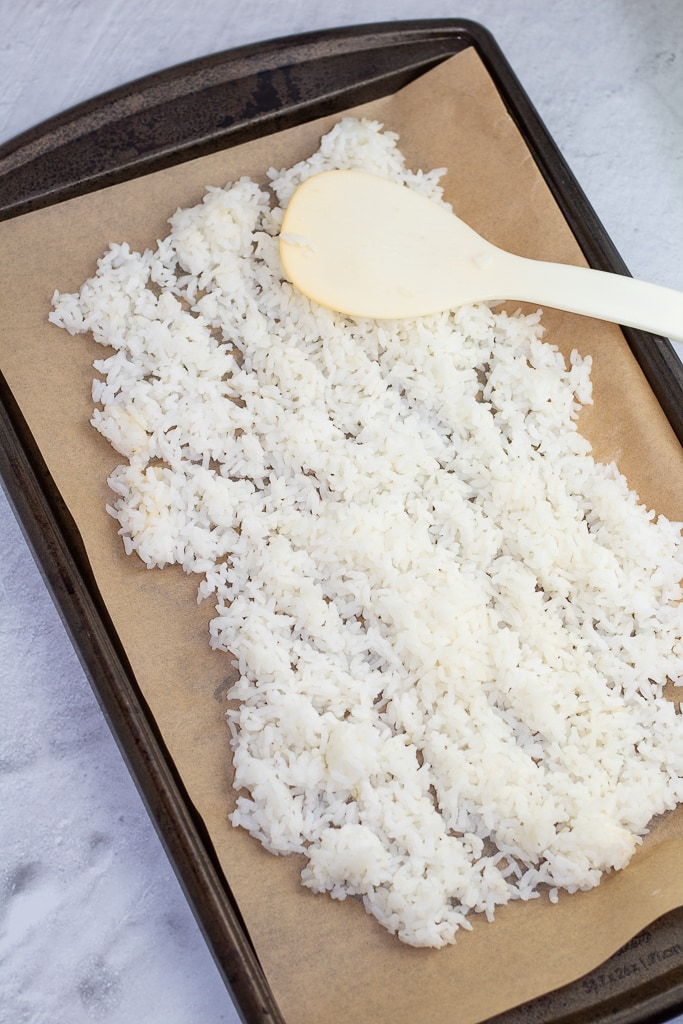
Spreading it thinly will aid in cooling it more quickly. When you stir and spread the rice, do it gently so that the rice does not become mushy. I like to draw thin lines, with my rice paddle flipped on its side, down the length of the pan using a dragging motion to accomplish this.
Once the rice is coated with the mixture and cooling, the fun begins! In Japan, they often set the pan under a ceiling fan or make it a group event and use paper fans or a piece of cardboard to fan and aid in cooling the rice down quickly.
Cooking the sweet potatoes
STEP #4: The sweet potatoes will need to be cooked before using them in a sushi roll. The best way we’ve found is to slice them into steak fry wedges and bake them at 425°F for about 20 minutes or cook them in your air fryer for approximately 7-8 minutes.
If you plan to include other vegetables, raw asparagus is a great choice, or it can be cooked a little if preferred. We just like a little crunch, so we never cook ours.
How to make sweet potato sushi rolls
STEP #5: We recommend sliding your sushi mat into a twist-tie gallon-sized plastic bag or covering it with plastic wrap because it will greatly simplify the rolling and clean-up processes.
There are two main types of rolls that we use when making veggie sushi at home. Vegetarian sushi like these sweet potato sushi rolls can be made either way.
- Maki rolls- These use nori seaweed sheets on the outside of the rolls.
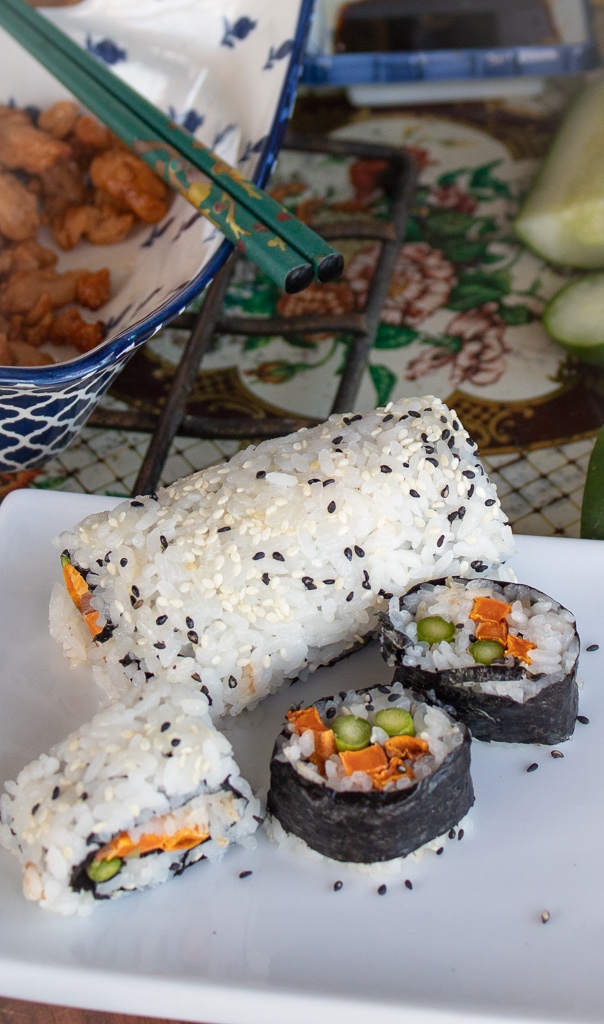
- Uramaki rolls- Instead of seaweed, these rolls use sesame seeds on the outside.
STEP #6: On your bamboo sushi rolling mat covered in plastic, place a sheet of nori with the rough side up, and the lines running in the same direction as the bamboo mat. If you need a little help, this article on How to Roll Sushi includes a short video.
Spread the rice all the way out to the edges. You can use a rubber spatula, your rice paddle, or your damp fingertips to smooth it more evenly if you need to. For a maki roll, with the nori on the outside, go all the way out to the very edge except for the one furthest from you. Leave about a ½-inch edge of nori on the far end blank, that will help seal the roll later.
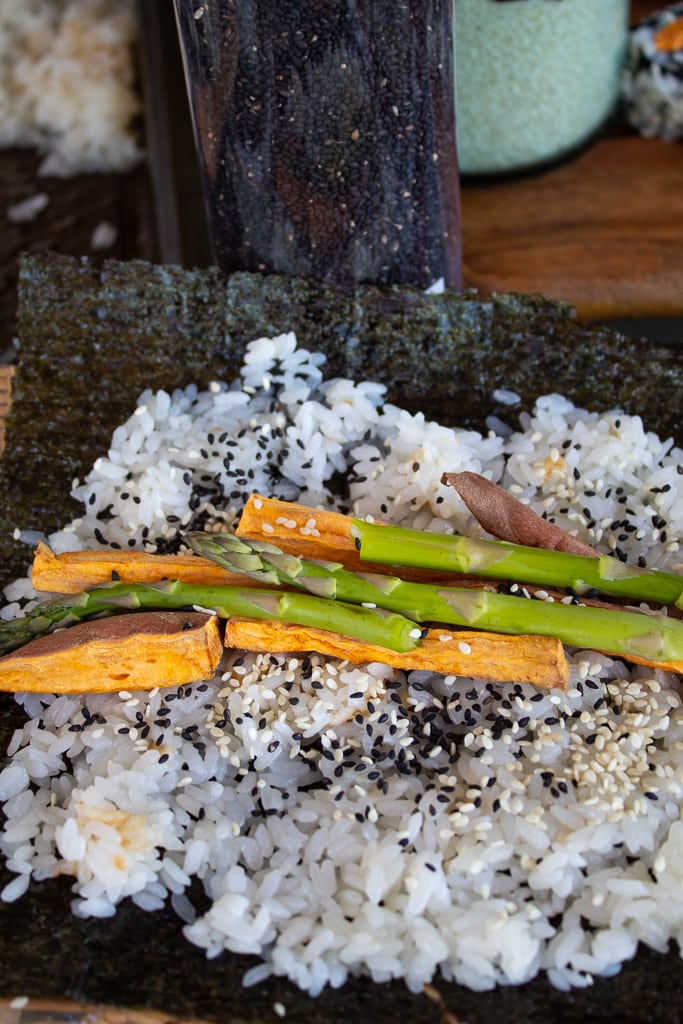
STEP #7: Begin to add your ingredients. I add mine in the center. You want to lay out your fillings in a horizontal row. Try to keep them close enough to bundle together easily.

STEP #8: Starting at the end closest to you, carefully lift the edge of the mat to bring it up and over the fillings. Begin rolling, using the mat to encourage the roll to take on a circular shape. As you roll, gently squeeze to tighten the roll up as it forms. This will help compress the rice enough to hold it together, which will keep the sushi from falling apart. Take care not to let the bamboo mat or the plastic wrap get caught up in the roll.
When the roll is completely formed, use your fingers and run them along the ½-inch strip of nori that was left uncovered at the end with dampened fingers. This will help the edge to stick to the outside of the roll, creating a secure seal.
Cutting the sushi rolls
STEP #9: Lightly wet a serrated or very sharp knife and begin slicing the sushi into even pieces. Every so often, you will probably need to clean off the knife and wet it again to keep the slices neat.
If you are planning to pack these for lunch or eat them for a meal at home, you may want to cut them in half for easier handling or just skip the cutting process altogether.
Dipping sauce options
These oil-free dipping sauce options for vegan and vegetarian sushi are packed with flavor, enhancing your sushi experience without added fats, making them a healthy and delicious choice for plant-based diets. Perfect for those seeking lighter, guilt-free sauces that complement every bite.
Ways to serve vegetable sushi
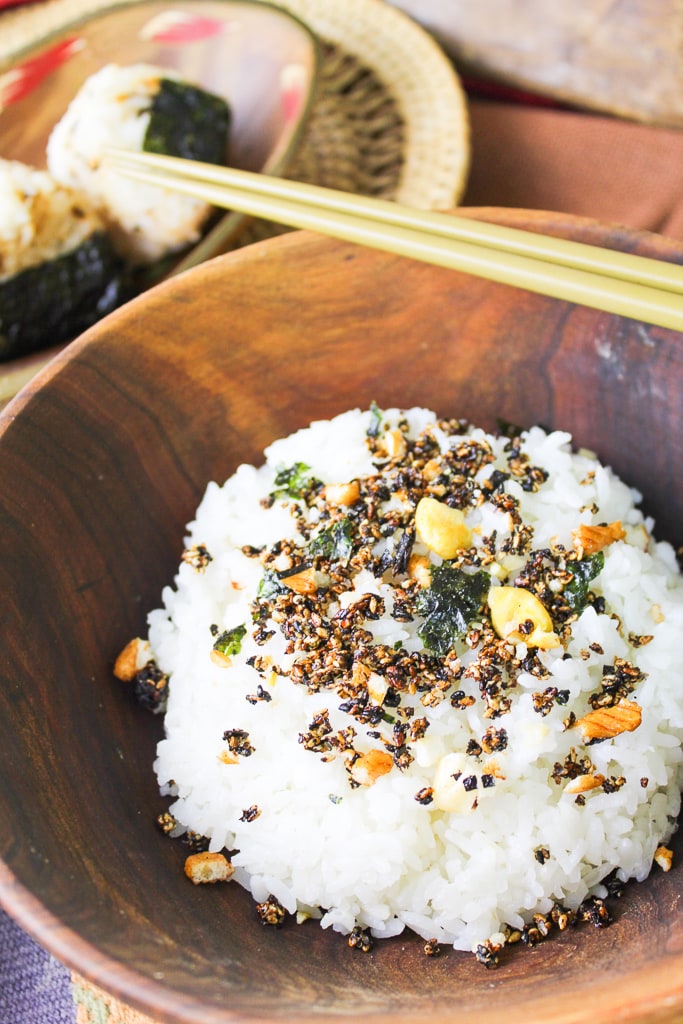
We absolutely love vegetable sushi and always serve it with a little pickled ginger on the side. You might even try sprinkling a little furikake rice seasoning on it.
I know a lot of people love sushi with wasabi, but I personally don’t have the stomach for wasabi. Ginger is more my thing. Oftentimes, we serve vegetable sushi as the main course with my Easy Vegan Miso Soup as a side.
Frequently Asked Questions
Yes, sweet potato sushi rolls are very healthy and happen to be vegan, vegetarian, and gluten-free! Sweet potatoes are loaded with antioxidants and phytonutrients, and they are very low in fat. Since we aren’t battering and deep frying the potatoes, that makes them very heart-friendly and full of lots of fiber as well.
Vegan sweet potato sushi will typically last for up to 3 days when stored in an airtight container in the refrigerator, maintaining its freshness and flavor. Wrap sushi rolls in plastic wrap individually to store. If you plan to slice them, wait until you’re ready to serve to slice. For best results, enjoy it as soon as possible to experience the optimal texture and taste.
More Asian-Inspired Vegan Recipes
If you try this recipe, please let us know how you like it by rating it and leaving a comment. We love to hear from you!
Want to Save This Recipe?
Enter your email & I’ll send it to your inbox. Plus, get great new recipes from me every week!
By submitting this form, you consent to receive emails from EatPlant-Based
Sweet Potato Sushi Roll
Ingredients
- 2 medium sweet potatoes cut into wedges and cooked
- 8 asparagus spears raw (optional)
- 2.5 cups uncooked short grain rice medium grain will work too
- 2.25 cups water
- 1/4 cup rice vinegar
- 1/2 cup pure cane sugar or maple syrup
- 1.5 teaspoons salt optional
- 8 nori seaweed sheets
- Sesame seeds white or black (optional)
Instructions
How to make sushi rice
- Begin by rinsing the rice under cold water. The best way to do this is by using a rice rinsing bowl or a colander that is made for small grains.
- My sister, the recipe creator, uses a rice steamer to cook her sushi rice, and she suggests using short or medium-grain rice. The ratio for 8 sushi rolls is 2.5 cups uncooked rice to 2.25 cups water. Below, in the notes, we've listed the cooking methods using a rice steamer, Instant Pot, and stovetop.
- While the rice cooks, go ahead and make the rice seasoning with the rice vinegar, sugar, and salt. Mix the ingredients together in a saucepan and heat on medium-high. Watch carefully, and turn the heat off when it begins to simmer. You don’t want this mixture to come to a boil.
- When the rice has finished cooking, immediately dump it onto a baking sheet and pour the vinegar mixture over the top. Mix gently and begin spreading the rice evenly.
- Spreading it thinly will aid in cooling it more quickly. When you stir and spread the rice, do it gently so that the rice does not become mushy. I like to draw thin lines, with my rice paddle flipped on its side, down the length of the pan using a dragging motion to accomplish this.
- Once the rice is coated with the mixture and cooling, the fun begins! In Japan, they often set the pan under a ceiling fan or make it a group event and use paper fans or a piece of cardboard to fan and aid in cooling the rice down quickly.
Cooking the sweet potatoes
- The sweet potatoes will need to be cooked before using them in a sushi roll. The best way we’ve found is to slice them into steak fry wedges and bake them at 425°F for about 20 minutes or cook them in your air fryer for approximately 7-8 minutes.
- If you plan to include other vegetables, raw asparagus is a great choice, or it can be cooked a little if preferred. We just like a little crunch, so we never cook ours.
Making the sushi rolls
- We suggest sliding your sushi mat into a twist-tie gallon-sized plastic bag or covering it with plastic wrap because it will greatly simplify the rolling and clean-up processes.
- On your sushi rolling mat covered in plastic, place a sheet of nori with the rough side up, and the lines running in the same direction as the bamboo mat.
- Spread the rice all the way out to the edges. You can use a rubber spatula, your rice paddle, or your damp fingertips to smooth it more evenly if you need to. For a maki roll, with the nori on the outside, go all the way out to the very edge except for the one furthest from you. Leave about a ½-inch edge of nori on the far end blank, that will help seal the roll later.
- Begin to add your ingredients. I add mine in the center. You want to lay out your fillings in a horizontal row. Try to keep them close enough to bundle together easily.
- Starting at the end closest to you, carefully lift the edge of the mat to bring it up and over the fillings. Begin rolling, using the mat to encourage the roll to take on a circular shape. As you roll, gently squeeze to tighten the roll up as it forms. This will help compress the rice enough to hold it together, which will keep the sushi from falling apart. Take care not to let the bamboo mat or the plastic wrap get caught up in the roll.
- When the roll is completely formed, use your fingers and run them along the ½-inch strip of nori that was left uncovered at the end with dampened fingers. This will help the edge to stick to the outside of the roll, creating a secure seal.
Cutting the sushi roll
- Lightly wet a serrated or very sharp knife and begin slicing the sushi into even pieces. Every so often, you will probably need to clean off the knife and wet it again to keep the slices neat.
- If you are planning to pack these for lunch or eat them for a meal at home, you may want to cut them in half for easier handling or just skip the cutting process altogether.
Video
Notes
- Rice steamer method- Place water and rice in the rice steamer and press the ‘Cook’ button or the applicable button for your model.
- Instant Pot method- Cook in your Instant Pot on high for 3 minutes and allow for a 10-minute slow release.
- Stovetop method- Cook over high heat without the lid until it comes to a boil. Cover, reduce the heat to medium-low, and allow to cook for approximately 12 minutes. Remove it from the heat, leave the lid on, and let it steam for another 10 minutes.
- No mess- Sliding your mat into a gallon-sized twist-tie plastic bag or covering it with plastic wrap will greatly simplify the rolling and clean-up processes.
- Rice- Haiga Brown Rice is a good option because it is short-grain and sticky.
- Damp hands- Wetting your hands often while rolling the sushi will help with the stickiness.
- Storage- Wrap sushi rolls in plastic wrap individually to store. If you plan to slice them, wait until you’re ready to serve to slice. They can be stored in the refrigerator for up to 3 days.
- Bento box- Homemade sushi is great in bento boxes for packing lunches, and they are great for picnics too.
Nutrition
Disclaimer
To obtain the most accurate representation of the nutritional information in a given recipe, you should calculate the nutritional information with the actual ingredients used in your recipe, using your preferred nutrition calculator. You are solely responsible for ensuring that any nutritional information provided is accurate, complete, and useful.

About the Chef
Drenda-Michell Brennan lived in Japan in the 1980s and 90s where she enjoyed spending much of her time visiting the kitchens of family and friends, watching and learning to prepare traditional Japanese cuisine. She is the mother of three Japanese-American grown children and grandmother (HuneyGram) to nine grandchildren. Read More…
My Korean friend showed me how to make nori less fishy-tasting. She toasted the nori in a cast iron skillet first, before making her sushi. I went from being a sushi hater to a lover overnight. Ha!