Furikake (Japanese Rice Seasoning)
Homemade furikake is a Japanese rice seasoning that is not just for rice. Sprinkle it on ramen noodles, veggie sushi, poke bowls, and even popcorn to easily add flavor to almost any dish!

Experience the culinary charm of furikake, a beloved Japanese rice seasoning that transcends its traditional role, becoming a versatile dry condiment fit for a myriad of dishes. Its captivating blend of ingredients includes dried seaweed, sesame seeds, sugar, and salt, crafting a harmonious symphony of delicious umami flavors.
It is perfect for sprinkling over veggie grain bowls and vegetable stir-fries to bring an added flavor that is out of this world!
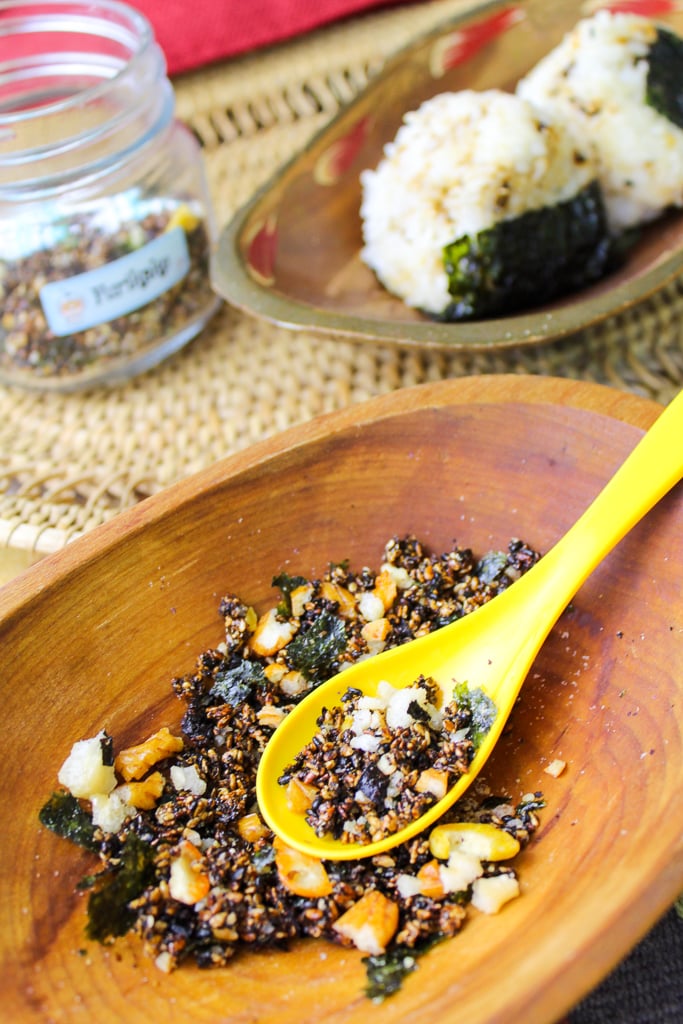
What is furikake?
Furikake is a Japanese rice seasoning blend that is sprinkled over rice and other dishes. It can effortlessly make bland foods take on a new dimension of taste and texture.
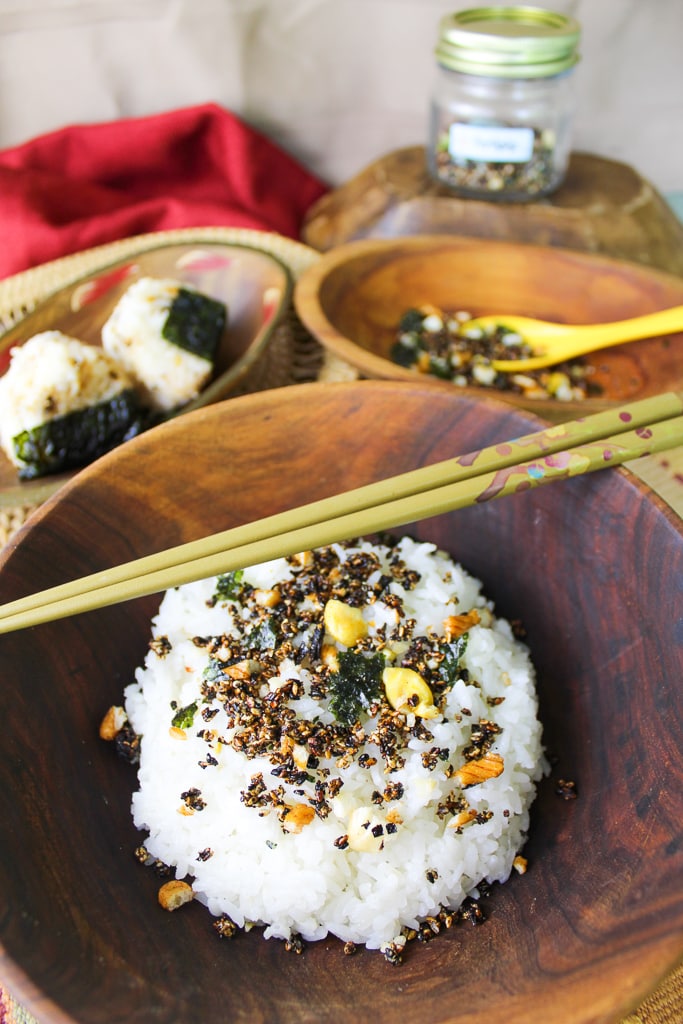
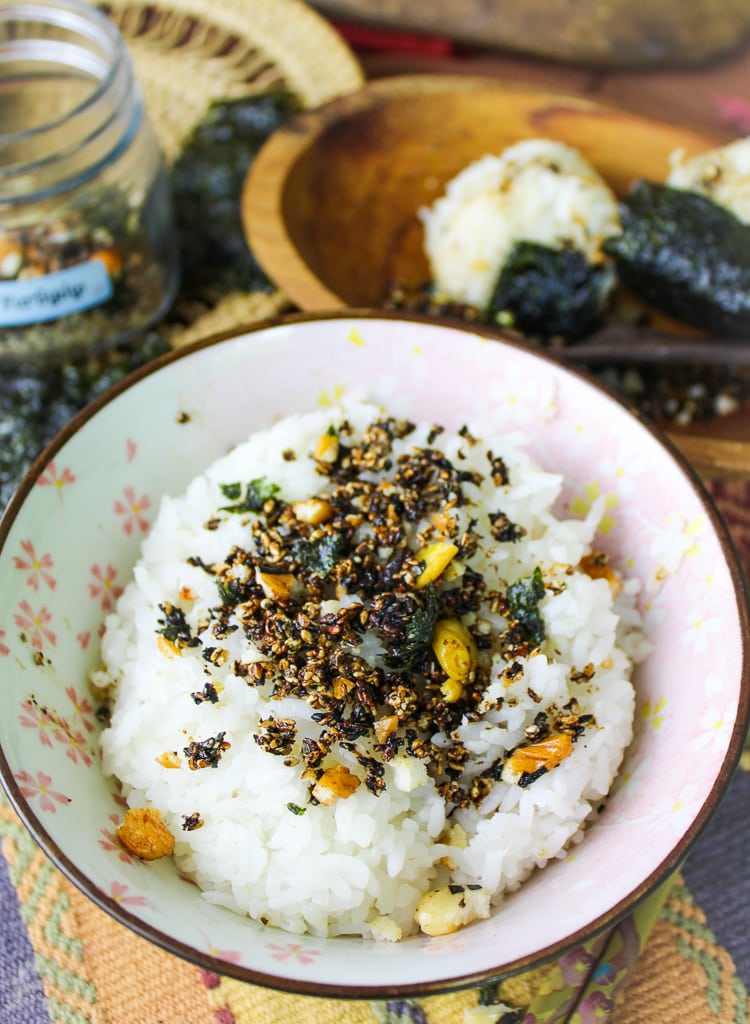
The word furikake literally means “to sprinkle” in Japanese. The flavor is an umami blend of salty and sweet with nori, toasted sesame seeds, and arare crackers creating a satisfying crunch.
Our furikake recipe is called Nori Komi Furikake. It is vegan, gluten-free, and is the most popular and basic furikake flavor.
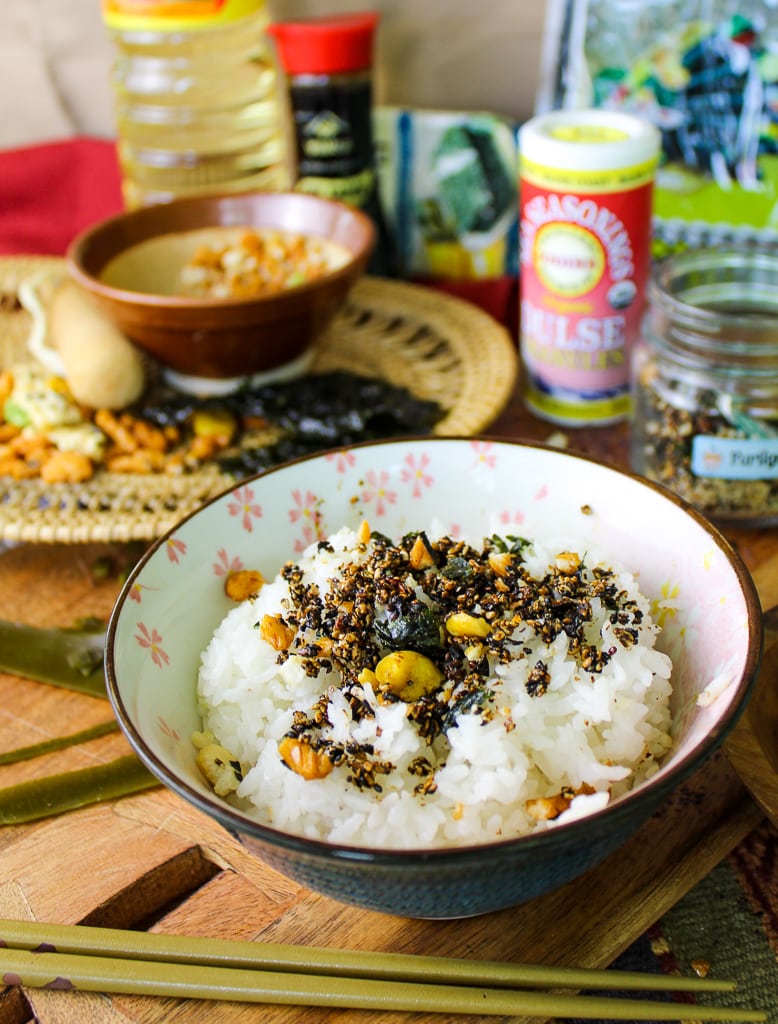
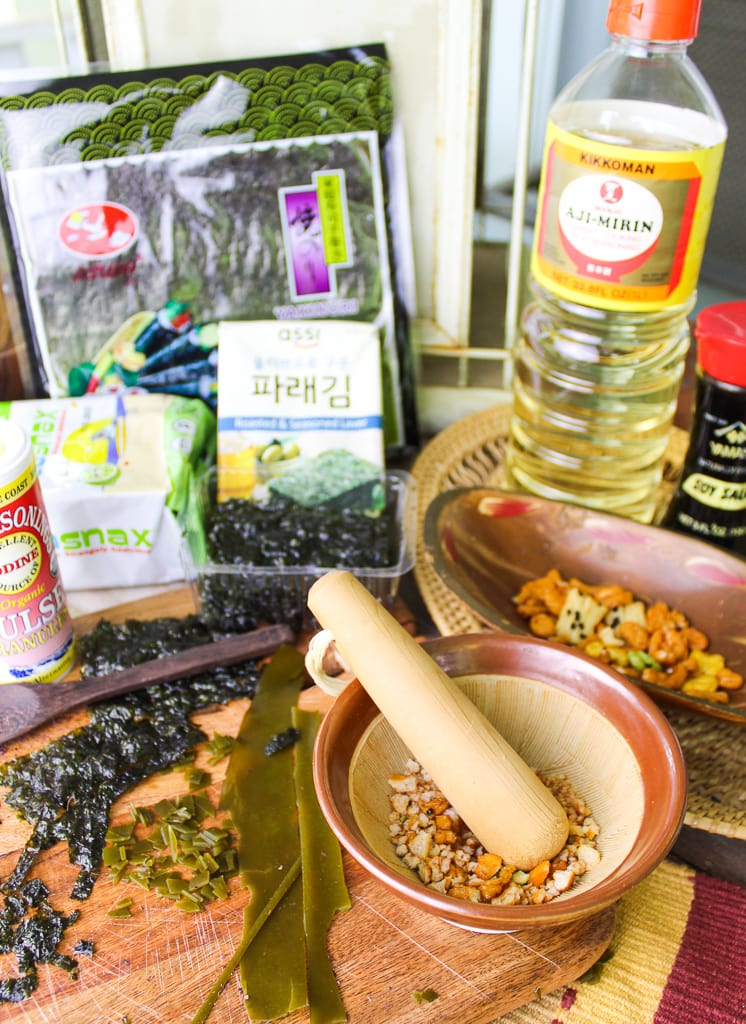
Ingredients needed to make furikake
Some of these ingredients may be new to you. That’s the exciting part of cooking and learning about new dishes and cultures. We have an ever-expanding list of Asian vegan recipes on this website where you can use these ingredients on a regular basis as you get more familiar with them.
Kombu
Kombu is a type of edible seaweed that is commonly used in Japanese cuisine. It is a key ingredient in making dashi, a traditional Japanese broth, and is also used to add umami flavor to various dishes.
Kombu is known for its rich source of minerals and nutrients, and it is often used in making sushi, soups, stews, and other savory dishes. It can be found in dried form and is rehydrated before use. Once rehydrated, it will regain its wet sticky texture. It can usually be found in Asian markets or online.
A great thing about kombu is that it can be used to make other recipes like kombu dashi Japanese soup broth. If you want to give this broth a try, the spent kombu can always be frozen and then repurposed in recipes like this furikake rather than thrown away. We’re all about recycling, especially when it comes to food!
Dulse Granules, Flakes, or Powder
Dulse granules, flakes, and powder are made from the red seaweed that grows wild on the northern coasts of the Atlantic and Pacific Oceans. It is rich in nutrients, especially iodine. It also contains protein, fiber, potassium, vitamin B6, and iron.
Dulse is a fun seasoning to have on hand because it’s easy to use and tastes a bit like bacon. It can be used as a salt alternative and added to many everyday recipes, including soups, bread, veggie pizza, salads, and vegetable dishes. It’s available in whole-leaf and flaked forms and can be purchased as a powder, granules, or seasoning mix. We used granules for this recipe which you can find in some grocery stores and online.
Nori Seaweed Sheets
Nori is the edible thin seaweed sheets that wrap around the outside of sushi. Nori absorbs moisture and becomes a little soggy, so be sure to use a fresh package for this recipe so that it will crumble easily. We love to use it to make our favorite vegan sweet potato sushi rolls.
Arare Japanese Rice Crackers
Arare senbei crackers are a traditional Japanese snack food. They are small crackers made from glutinous sticky rice and are baked with soy sauce or Tamari and other seasonings. You can usually find them inexpensively at most Asian grocers, and they are also available online. Be sure to read the labels well because many brands contain fish flavorings, but this one does not.
Seasonings
The seasonings used to make furikake include soy sauce, mirin, sweetener, and salt.
How to make furikake
This looks like a lot of steps, but it really isn’t difficult. We’ve broken it down to simplify it so you will flow through the process easily and quickly.
To begin, you will need to soak the kombu in warm water for 2-3 hours to rehydrate it. If you happened to have made our Easy Kombu Dashi Japanese Soup Broth in the past and frozen the spent kombu to use in other recipes, this is a great time to thaw it and use it instead of rehydrating more kombu. That’s what we do, and it makes this recipe come together much quicker.
I like to spread the rehydrated kombu out on paper towels and allow it to air dry for about 5-10 minutes to make it easier to work with. After that, cut the kombu into long thin slices and then dice the strips into small pieces. You can see from my photos how I do it. Once it’s in the frying pan it will shrink and become dry and flaky.
While you are prepping the kombu, go ahead and gather and prepare all of your other ingredients to have them ready, and preheat your oven to 400°F.
Heat a non-stick frying pan on medium-high and add the chopped kombu. Stirring frequently, cook uncovered for approximately five minutes. When the flakes become dark and crispy-looking, they are ready for you to add the other ingredients.
Add the sweetener, salt, sesame seeds, and dulse to the pan and toast the mixture together with the kombu until the white sesame seeds are light brown and fragrant. This doesn’t take long so watch carefully and stir.
Turn off the burner heat and immediately add your soy sauce and mirin to the mixture and whisk it all together. Don’t be afraid here, yes, it’s supposed to look like that.
Continue to stir until the liquid mixture has thoroughly coated all of the dry ingredients. This blending process allows the flavor to be absorbed into the furikake rice seasoning instead of just falling to the bottom of the container.
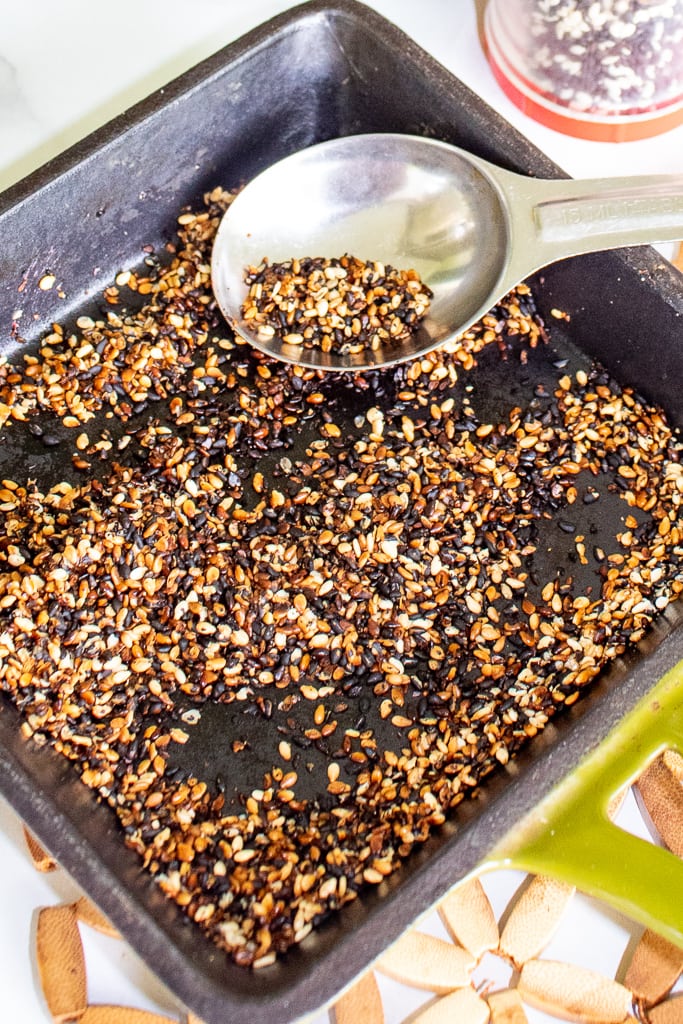
Next, transfer the mixture to a baking sheet lined with parchment paper to make for easy cleanup. Allow it to cool for a few minutes. Once it is cool enough to touch, break apart any big clumps. I use my hands, but you can also use the back of a flat spatula.
When you’re happy with the consistency, bake for 4-6 minutes. I have also used my air fryer (using a bed of foil if yours doesn’t have a tray) with great results. Baking aids in removing some of the moisture.
Remove it from the oven and allow it to cool. Once it has completely cooled, break apart any remaining clumps. You can use your hands, a potato masher, the back of your spatula, a mortar and pestle, or whatever method works best for your preferred granule size.
Now, it’s time to add the last two ingredients–nori/seaweed and the rice crackers.
Add the arare rice crackers to a bowl and break/grind the crackers into small crumbles. I use a mortar & pestle to do this, but again, you can use whatever you have on hand that gets the job done.
They need to be broken into small pieces but not ground to powder. We want them as small crumbles large enough so that we can still enjoy that great umami crunch.
Next is the nori/seaweed sheet(s). Use your hands, a sharp knife, or kitchen scissors to crumble or cut the nori sheets into small, thin strips or pieces. You can fold the sheet into rectangles or squares before cutting them to speed up the process.
Once it’s broken down into small flakes, add the cooled mixture from the baking sheet to the bowl and blend together well. When your nori furikake has cooled completely, you’re done. Serve and enjoy!
Storage and freezing
Make sure all the ingredients are completely dried before storing. Wet or damp ingredients can shorten the shelf life.
You can keep furikake in a sealed container at room temperature for 1-2 months by inserting silica packet. It will also refrigerate well for up to two weeks and freeze for up to a month without it.
Store in an airtight container in the fridge to keep the nori crisp.
Ways to use furikake
- Sprinkle over a bowl of rice. We have perfected making brown rice in your Instant Pot!
- Include it as a seasoning for healthy air-popped popcorn
- Add it to a poke bowl (veggie & grain bowl)
- Roll veggie sushi rolls in it before serving
- Sprinkle over vegetable stir-fries
- Add to ramen noodle bowls
- Sprinkle over avocado toast
Other great ways to use furikake include adding it to udon pasta dishes, rice porridge, party mix, potatoes, salads, and anything else you can think of. It takes minimal effort to make furikake in batches, and it makes a fun gift to share with friends.
Recipes that could use a little furikake
- Tofu Veggie Stir Fry
- Easy Veggie Sushi
- Sweet Potato Rice Bowl
- Veggie Grain Bowl
- Miso Ramen Noodle Bowl
For those of you new to the whole food plant-based lifestyle, we’ve created a FREE 7-Day Plant-Based Menu Planner to help you get started!
If you try this recipe, please let us know how you like it by rating it and leaving a comment. We love to hear from you!
Want to Save This Recipe?
Enter your email & I’ll send it to your inbox. Plus, get great new recipes from me every week!
By submitting this form, you consent to receive emails from EatPlant-Based
Furikake (Japanese Rice Seasoning)
Ingredients
- 1/4 cup kombu rehydrated and chopped
- 3 tablespoons toasted white sesame seeds
- 1 tablespoon toasted black sesame seeds
- 1 tablespoon dulse granules seaweed
- 1-2 sheets nori dried seaweed
- 1/4 cup arare Japanese rice crackers optional but recommended
- 1 teaspoon sugar
- 1/2 teaspoon kosher salt
- 1 teaspoon mirin
- 1 teaspoon soy sauce or tamari
Instructions
- This looks like a lot of steps, but it really isn’t difficult. We’ve broken it down to simplify it so you will flow through the process easily and quickly.
- To begin, you will need to soak the kombu in warm water for 2-3 hours to rehydrate it. See our notes below about how we speed this process up.
- I like to spread the rehydrated kombu out on paper towels and allow it to air dry for about 5-10 minutes to make it easier to work with. After that, cut the kombu into long thin slices and then dice the strips into small pieces. You can see from my photos how I do it. Once it’s in the frying pan it will shrink and become dry and flaky.
- While you are prepping the kombu, go ahead and gather and prepare all of your other ingredients to have them ready, and preheat your oven to 400°F.
- Heat a non-stick frying pan on medium-high and add the chopped kombu. Stirring frequently, cook uncovered for approximately five minutes. When the flakes become dark and crispy-looking, they are ready for you to add the other ingredients.
- Add the sweetener, salt, sesame seeds, and dulse to the pan and toast the mixture together with the kombu until the white sesame seeds are light brown and fragrant. This doesn’t take long so watch carefully and stir.
- Turn off the burner heat and immediately add your soy sauce and mirin to the mixture and whisk it all together. Don’t be afraid here, yes, it’s supposed to look like that.
- Continue to stir until the liquid mixture has thoroughly coated all of the dry ingredients. This blending process allows the flavor to be absorbed into the furikake rice seasoning instead of just falling to the bottom of the container.
- Next, transfer the mixture to a baking sheet lined with parchment paper to make for easy cleanup. Allow it to cool for a few minutes. Once it is cool enough to touch, break apart any big clumps. I use my hands, but you can also use the back of a flat spatula.
- When you’re happy with the consistency, bake for 4-6 minutes. I have also used my air fryer (using a bed of foil if yours doesn’t have a tray) with great results. Baking aids in removing some of the moisture.
- Remove it from the oven and allow it to cool. Once it has completely cooled, break apart any remaining clumps. You can use your hands, a potato masher, the back of your spatula, a mortar and pestle, or whatever method works best for your preferred granule size.
- Now, it’s time to add the last two ingredients–nori/seaweed and the rice crackers.
- Add the arare rice crackers to a bowl and break/grind the crackers into small crumbles. I use a mortar & pestle to do this, but again, you can use whatever you have on hand that gets the job done.
- They need to be broken into small pieces but not ground to powder. We want them as small crumbles large enough so that we can still enjoy that great umami crunch.
- Next is the nori/seaweed sheet(s). Use your hands, a sharp knife, or kitchen scissors to crumble or cut the nori sheets into small, thin strips or pieces. You can fold the sheet into rectangles or squares before cutting them to speed up the process.
- Once it’s broken down into small flakes, add the cooled mixture from the baking sheet to the bowl and blend together well. When your nori furikake has cooled completely, you’re done. Serve and enjoy!
Video
Notes
Arare Japenese crackers
Arare senbei crackers are a traditional Japanese snack food. They are small crackers made from glutinous sticky rice and are baked with soy sauce or Tamari and other seasonings. You can usually find them inexpensively at most Asian grocers and they are also available online. Be sure to read the labels well because many brands do contain fish flavorings, but this one does not. About the Chef Drenda Michell Brennan lived in Japan in the 1990s and learned many traditional Asian cooking methods. She is the mother of 3 Japanese-American grown children and grandmother (HuneyGram) to 8 grandchildren. She also happens to be the sister of Terri Edwards, of EatPlant-Based. Read more about her story in this article, From Veggie Hater to Plant-Based.Nutrition
Disclaimer
To obtain the most accurate representation of the nutritional information in a given recipe, you should calculate the nutritional information with the actual ingredients used in your recipe, using your preferred nutrition calculator. You are solely responsible for ensuring that any nutritional information provided is accurate, complete, and useful.


